

#集成到现有应用
将 Lynx 作为高性能、跨平台的 UI 渲染引擎,灵活地嵌入到现有应用的任意位置。这种 既有(Brownfield) 接入方式具有最高的灵活性,支持全部平台,让你无需重写就能渐进式采用 Lynx,常用于大规模生产应用。
#将 Lynx 集成到 iOS 平台
- 本文假设你已熟悉原生 iOS 应用开发的基本概念。
- 下文中的所有代码,你都可以参考项目:integrating-lynx-demo-projects
#1. 依赖配置
使用 Cocoapods 可以方便的将 Lynx 集成到你的应用中
- Cocoapods: >= 1.11.3
- Ruby: >= 2.6.10
#配置依赖
- Lynx
Lynx Engine 核心能力,包含了解析 Bundle、样式解析、排版以及渲染视图等基础能力。
从 Cocoapods 中获取 Lynx 的最新版本。然后将 Lynx 添加到你的 Podfile 中:
source 'https://cdn.cocoapods.org/'

platform :ios, '10.0'

target 'YourTarget' do
  pod 'Lynx', '4.0.0', :subspecs => [
    'Framework',
  ]

  pod 'PrimJS', '4.0.0', :subspecs => ['quickjs', 'napi']
end- Lynx Service
Lynx Service 包括 LynxImageService、LynxLogService 等,旨在提供一些宿主应用特性强相关的能力,允许宿主应用在运行时注入自定义实现 Image Service 默认是使用 SDWebImage 图片库实现,在没有集成 SDWebImage 组件的宿主应用上则可以依赖其他图片库。
Lynx 提供了标准的原生 Image、Log、Http 服务的能力,接入方可以快速接入并使用;
从 Cocoapods 中获取 Lynx Service 的最新版本。然后将 Lynx Service 添加到你的 Podfile 中:
source 'https://cdn.cocoapods.org/'

platform :ios, '10.0'

target 'YourTarget' do
  pod 'Lynx', '4.0.0', :subspecs => [
    'Framework',
  ]

  pod 'PrimJS', '4.0.0', :subspecs => ['quickjs', 'napi']

  # integrate image-service, log-service, and http-service
  pod 'LynxService', '4.0.0', :subspecs => [
      'Image',
      'Log',
      'Http',
  ]

  # ImageService
  pod 'SDWebImage','5.15.5'
  pod 'SDWebImageWebPCoder', '0.11.0'
end- More Elements
XElement 是 Lynx 团队维护的客户端扩展元件集合,提供更丰富的元件能力,能够让 Lynx 能够更快速的被用到生产环境中,提升 Lynx 生态的活力。
从 Cocoapods 中获取 XElement 的最新版本。然后将 XElement 添加到你的 Podfile 中:
source 'https://cdn.cocoapods.org/'

platform :ios, '10.0'

target 'YourTarget' do
  pod 'Lynx', '4.0.0', :subspecs => [
    'Framework',
  ]

  pod 'PrimJS', '4.0.0', :subspecs => ['quickjs', 'napi']

  # integrate image-service, log-service, and http-service
  pod 'LynxService', '4.0.0', :subspecs => [
      'Image',
      'Log',
      'Http',
  ]

  # ImageService
  pod 'SDWebImage','5.15.5'
  pod 'SDWebImageWebPCoder', '0.11.0'

  pod 'XElement', '4.0.0'
end#安装依赖
运行 pod install 安装依赖,然后打开你的 XCode 工程,同时需要确保关闭 Sandbox Scripting 能力。
为了关闭 Sandbox Scripting 能力,在 XCode 中点击应用,切换至 Build Settings。过滤 script 关键字,并且将 User Script Sandboxing 置为 NO。
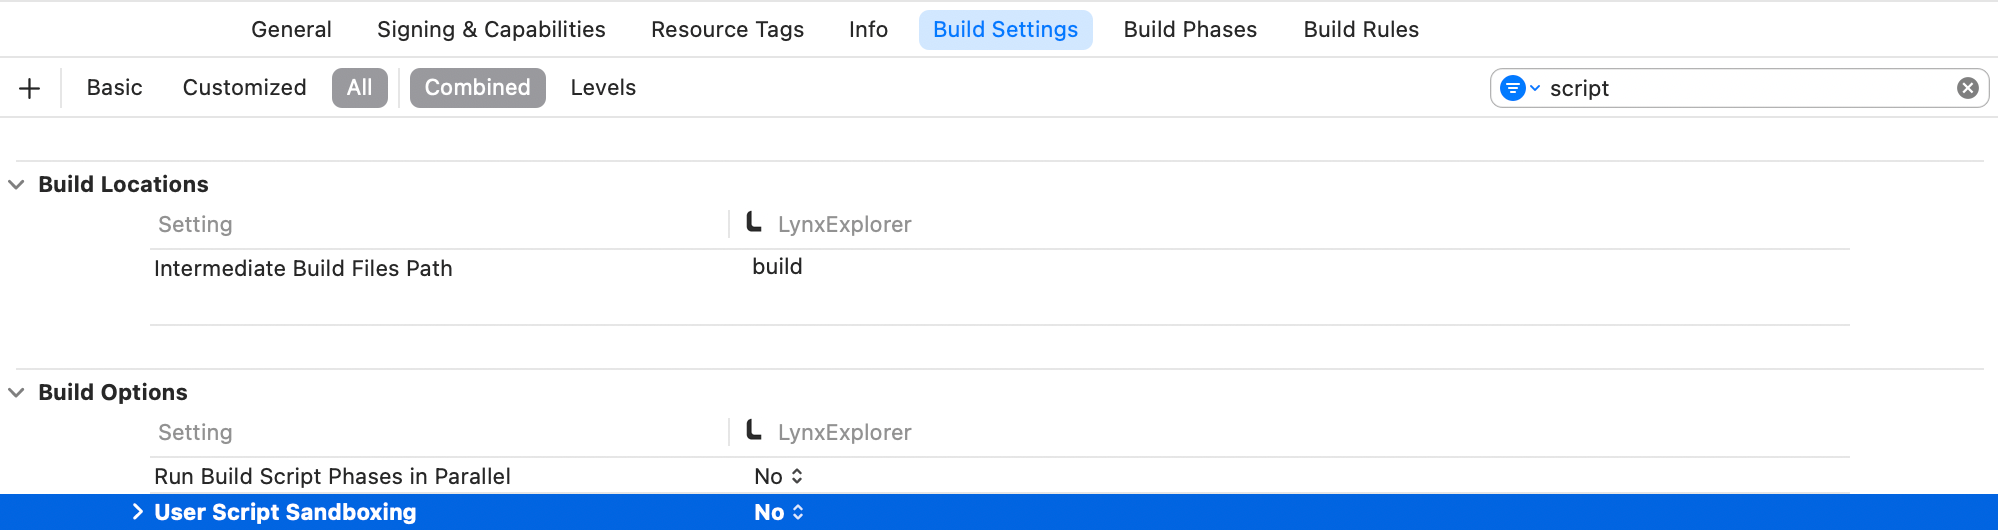
如果你使用 Xcode 26.x 构建,并且 Lynx pod 因为 warning 被当作 error 而编译失败,可以在 Podfile 中添加 post_install hook,将相关 warning 降级:
post_install do |installer|
  installer.pods_project.targets.each do |target|
    target.build_configurations.each do |config|
      config.build_settings['GCC_TREAT_WARNINGS_AS_ERRORS'] = 'NO'

      disable = ['-Wno-error', '-Wno-c99-designator',
                 '-Wno-deprecated-declarations', '-Wno-deprecated-implementations']
      ['OTHER_CPLUSPLUSFLAGS', 'OTHER_CFLAGS'].each do |key|
        flags = config.build_settings[key] || ['$(inherited)']
        flags = [flags] unless flags.is_a?(Array)
        config.build_settings[key] = flags + disable
      end
    end
  end
end#2. Lynx 环境初始化
#LynxEnv 初始化
LynxEnv 提供了 Lynx Engine 的全局初始化接口。请保证 LynxEnv 的初始化发生在 Lynx Engine 的任何接口调用之前;例如可以在 AppDelegate 中完成初始化
#import <Lynx/LynxEnv.h>
#import <Lynx/LynxView.h>

@implementation AppDelegate
- (BOOL)application:(UIApplication *)application didFinishLaunchingWithOptions:(NSDictionary *)launchOptions {
  [LynxEnv sharedInstance];
  return YES;
}import UIKit
@UIApplicationMain
class AppDelegate: UIResponder, UIApplicationDelegate {
var window: UIWindow?
func application(_ application: UIApplication, didFinishLaunchingWithOptions launchOptions: [UIApplication.LaunchOptionsKey: Any]?) -> Bool {
LynxEnv.sharedInstance()
return true
}
}
#3. 渲染 LynxView
LynxView 是 Lynx Engine 提供的渲染基本单元,LynxView 是一个继承自 iOS 原生 UIView 的实现,你可以快速的构造一个 LynxView,并将其添加到 ViewController 的视图上。
#创建 Bundle 加载器
Lynx Engine 自身并没有资源加载的能力,因此需要在初始化 LynxEnv,或者构造 LynxView 时传入 LynxTemplateProvider 协议的具体实现,Lynx 会采用注入的资源加载器来获取真实的 Bundle 内容
你可以使用多种方式获取 Bundle 的资源内容,在这里我们选择将 Bundle 的内容内置在应用中:
- 首先请将快速上手阶段生成的 Bundle 文件或者将下面的文件下载到本机上,然后按照如下步骤将文件内置:
内置文件步骤:
- 在项目的目标设置中,选择目标 Target;
- 选择 Build Phases 选项卡;
- 在 Copy Bundle Resources 部分,点击加号按钮(+)以添加文件;
- 实现 Bundle 加载器
#import <Foundation/Foundation.h>
#import <Lynx/LynxTemplateProvider.h>

NS_ASSUME_NONNULL_BEGIN

@interface DemoLynxProvider : NSObject <LynxTemplateProvider>

@end

NS_ASSUME_NONNULL_ENDLynx 是使用 Objective-C 构建的项目,如果你使用的是 Swift 工程,请使用 Bridging Header 引入所需的 Lynx 头文件。
#import <Lynx/LynxConfig.h>
#import <Lynx/LynxEnv.h>
#import <Lynx/LynxTemplateProvider.h>
#import <Lynx/LynxView.h>#import <Foundation/Foundation.h>
#import "DemoLynxProvider.h"
@implementation DemoLynxProvider
- (void)loadTemplateWithUrl:(NSString*)url onComplete:(LynxTemplateLoadBlock)callback {
NSString *filePath = [[NSBundle mainBundle] pathForResource:url ofType:@"bundle"];
if (filePath) {
NSError *error;
NSData *data = [NSData dataWithContentsOfFile:filePath options:0 error:&error];
if (error) {
NSLog(@"Error reading file: %@", error.localizedDescription);
callback(nil, error);
} else {
callback(data, nil);
}
} else {
NSError *urlError = [NSError errorWithDomain:@"com.lynx"
code:400
userInfo:@{NSLocalizedDescriptionKey : @"Invalid URL."}];
callback(nil, urlError);
}
}
@endimport Foundation
class DemoLynxProvider: NSObject, LynxTemplateProvider {
func loadTemplate(withUrl url: String!, onComplete callback: LynxTemplateLoadBlock!) {
if let filePath = Bundle.main.path(forResource: url, ofType: "bundle") {
do {
let data = try Data(contentsOf: URL(fileURLWithPath: filePath))
callback(data, nil)
} catch {
print("Error reading file: \(error.localizedDescription)")
callback(nil, error)
}
} else {
let urlError = NSError(domain: "com.lynx", code: 400, userInfo: [NSLocalizedDescriptionKey: "Invalid URL."])
callback(nil, urlError)
}
}
}#构造基础 LynxView
按照如下的方式构造一个最基础的 LynxView 实例:
#import <Lynx/LynxView.h>
#import "ViewController.h"
#import "DemoLynxProvider.h"

@implementation ViewController

- (void)viewDidLoad {
    [super viewDidLoad];
    LynxView *lynxView = [[LynxView alloc] initWithBuilderBlock:^(LynxViewBuilder *builder) {
      builder.config = [[LynxConfig alloc] initWithProvider:[[DemoLynxProvider alloc] init]];
      builder.screenSize = self.view.frame.size;
      builder.fontScale = 1.0;
    }];
    lynxView.preferredLayoutWidth = self.view.frame.size.width;
    lynxView.preferredLayoutHeight = self.view.frame.size.height;
    lynxView.layoutWidthMode = LynxViewSizeModeExact;
    lynxView.layoutHeightMode = LynxViewSizeModeExact;
}
@endimport UIKit
class ViewController: UIViewController {
override func viewDidLoad() {
super.viewDidLoad()
let lynxView = LynxView { builder in
builder.config = LynxConfig(provider: DemoLynxProvider())
builder.screenSize = self.view.frame.size
builder.fontScale = 1.0
}
lynxView.preferredLayoutWidth = self.view.frame.size.width
lynxView.preferredLayoutHeight = self.view.frame.size.height
lynxView.layoutWidthMode = .exact
lynxView.layoutHeightMode = .exact
}
}
#将 LynxView 添加到视图
然后将 LynxView 添加到应用视图中:
#import <Lynx/LynxView.h>

#import "ViewController.h"
#import "DemoLynxProvider.h"

@implementation ViewController

- (void)viewDidLoad {
  [super viewDidLoad];

  // ...

  [self.view addSubview:lynxView];
}

@endimport UIKit
class ViewController: UIViewController {
override func viewDidLoad() {
super.viewDidLoad()
// ...
self.view.addSubview(lynxView)
}
}
#渲染视图
当你完成以上步骤之后,你就已经完成了 LynxView 初始化的全部工作,调用 lynxView.loadTemplateFromURL 方法,即可将对应的 Bundle 渲染到 LynxView 视图上,
#import <Lynx/LynxView.h>

#import "ViewController.h"
#import "DemoLynxProvider.h"

@implementation ViewController

- (void)viewDidLoad {
  [super viewDidLoad];

  // ...

  [lynxView loadTemplateFromURL:@"main.lynx" initData:nil];
}

@endimport UIKit
class ViewController: UIViewController {
override func viewDidLoad() {
super.viewDidLoad()
// ...
lynxView.loadTemplate(fromURL: "main.lynx", initData: nil)
}
}
然后你将在屏幕上看到如下内容:
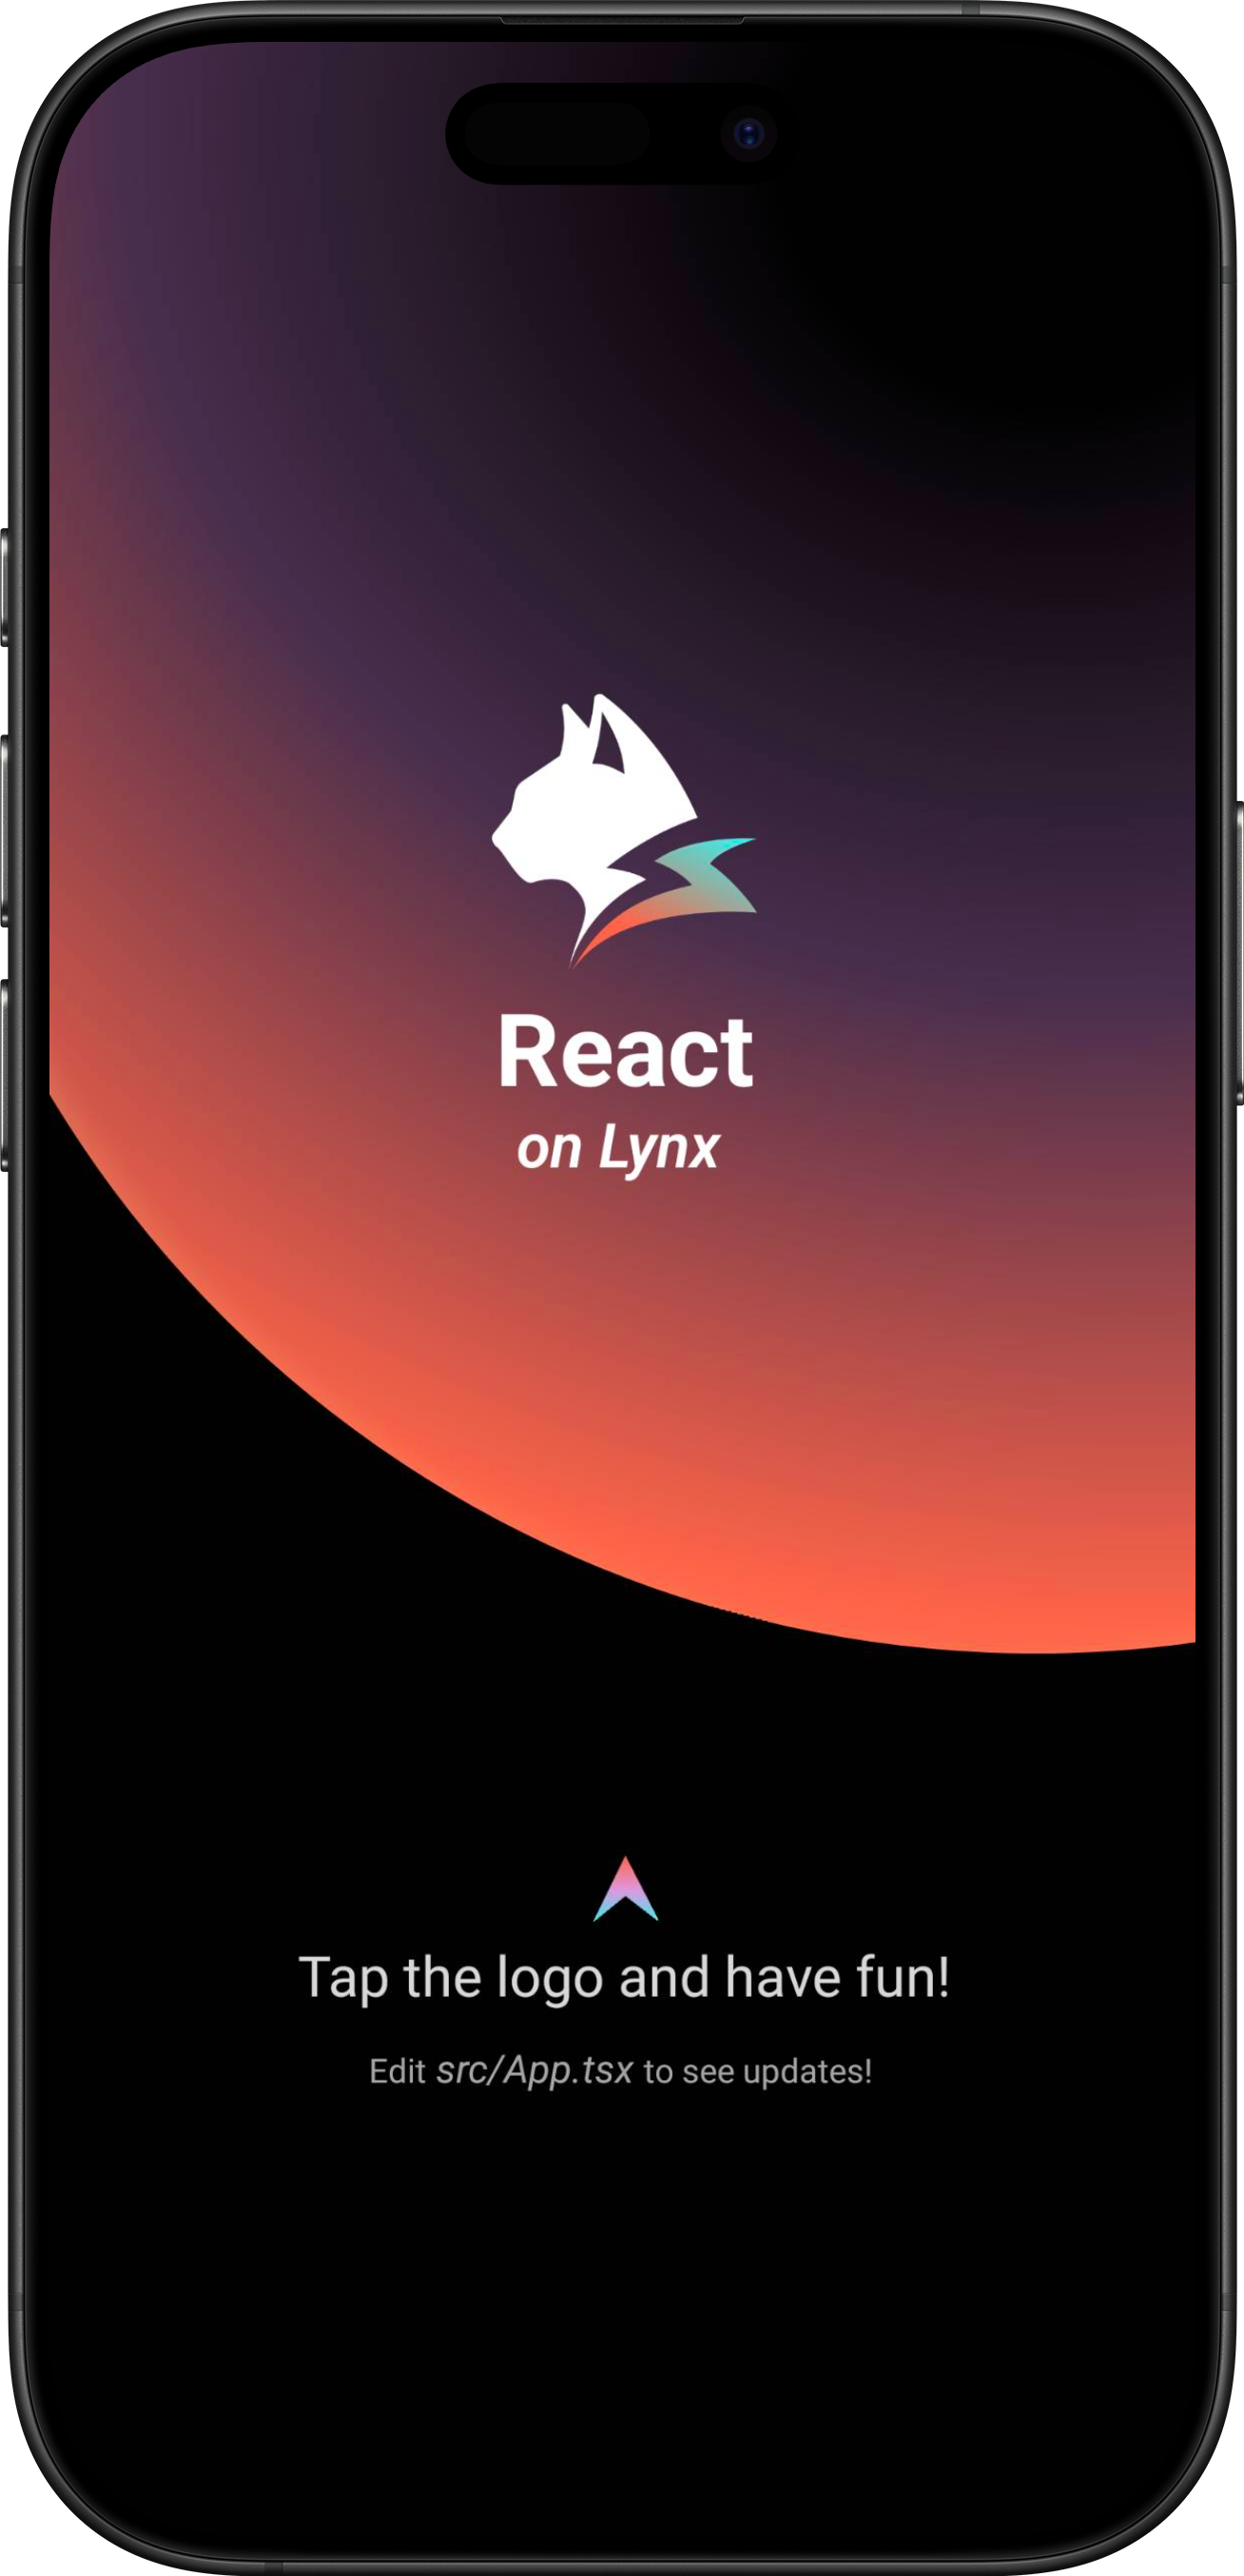
恭喜你,现在你现在已经完成了 Lynx Engine 集成的全部工作!
#4. 进入 Lynx 世界
#将 Lynx 集成到 Android 平台
- 本文假设你已熟悉原生 Android 应用开发的基本概念。
- 下文中的所有代码,你都可以参考项目: integrating-lynx-demo-projects
#1. 依赖配置
#包依赖
- Lynx
Lynx Engine 核心能力,包含了解析 Bundle、样式解析、排版以及渲染视图等基础能力,以及 Lynx 页面依赖的 JavaScript 运行时基础代码
dependencies {
    // lynx dependencies
    implementation "org.lynxsdk.lynx:lynx:4.0.0"
    implementation "org.lynxsdk.lynx:lynx-jssdk:4.0.0"
    implementation "org.lynxsdk.lynx:lynx-trace:4.0.0"
    implementation "org.lynxsdk.lynx:primjs:4.0.0"
}dependencies {
// lynx dependencies
implementation("org.lynxsdk.lynx:lynx:4.0.0")
implementation("org.lynxsdk.lynx:lynx-jssdk:4.0.0")
implementation("org.lynxsdk.lynx:lynx-trace:4.0.0")
implementation("org.lynxsdk.lynx:primjs:4.0.0")
}- Lynx Service
Lynx Service 包括 LynxImageService、LynxLogService 等,旨在提供一些宿主应用特性强相关的能力,允许宿主应用在运行时注入自定义实现,也可以使用 Lynx 提供的默认实现。
例如 LynxImageService 默认是使用 Fresco 图片库实现,在没有集成 Fresco 组件的应用上则可以依赖其他图片库,比如 Glide 来实现。Lynx 提供了标准的原生 Image、Log、Http 服务的能力,接入方可以快速接入并使用;
dependencies {
    // lynx dependencies
    implementation "org.lynxsdk.lynx:lynx:4.0.0"
    implementation "org.lynxsdk.lynx:lynx-jssdk:4.0.0"
    implementation "org.lynxsdk.lynx:lynx-trace:4.0.0"
    implementation "org.lynxsdk.lynx:primjs:4.0.0"

    // integrating image-service
    implementation "org.lynxsdk.lynx:lynx-service-image:4.0.0"

    // image-service dependencies, if not added, images cannot be loaded; if the host APP needs to use other image libraries, you can customize the image-service and remove this dependency
    implementation "com.facebook.fresco:fresco:2.3.0"
    implementation "com.facebook.fresco:animated-gif:2.3.0"
    implementation "com.facebook.fresco:animated-webp:2.3.0"
    implementation "com.facebook.fresco:webpsupport:2.3.0"
    implementation "com.facebook.fresco:animated-base:2.3.0"

    implementation "com.squareup.okhttp3:okhttp:4.9.0"

    // integrating log-service
    implementation "org.lynxsdk.lynx:lynx-service-log:4.0.0"

    // integrating http-service
    implementation "org.lynxsdk.lynx:lynx-service-http:4.0.0"
}dependencies {
// lynx dependencies
implementation("org.lynxsdk.lynx:lynx:4.0.0")
implementation("org.lynxsdk.lynx:lynx-jssdk:4.0.0")
implementation("org.lynxsdk.lynx:lynx-trace:4.0.0")
implementation("org.lynxsdk.lynx:primjs:4.0.0")
// integrating image-service
implementation("org.lynxsdk.lynx:lynx-service-image:4.0.0")
// image-service dependencies, if not added, images cannot be loaded; if the host APP needs to use other image libraries, you can customize the image-service and remove this dependency
implementation("com.facebook.fresco:fresco:2.3.0")
implementation("com.facebook.fresco:animated-gif:2.3.0")
implementation("com.facebook.fresco:animated-webp:2.3.0")
implementation("com.facebook.fresco:webpsupport:2.3.0")
implementation("com.facebook.fresco:animated-base:2.3.0")
// integrating log-service
implementation("org.lynxsdk.lynx:lynx-service-log:4.0.0")
// integrating http-service
implementation("org.lynxsdk.lynx:lynx-service-http:4.0.0")
implementation("com.squareup.okhttp3:okhttp:4.9.0")
}- More Elements
XElement 是 Lynx 团队维护的客户端扩展元件集合,提供更丰富的元件能力,能够让 Lynx 能够更快速的被用到生产环境中,提升 Lynx 生态的活力。
dependencies {
    // lynx dependencies
    implementation "org.lynxsdk.lynx:lynx:4.0.0"
    implementation "org.lynxsdk.lynx:lynx-jssdk:4.0.0"
    implementation "org.lynxsdk.lynx:lynx-trace:4.0.0"
    implementation "org.lynxsdk.lynx:primjs:4.0.0"
    // integrating image-service
    implementation "org.lynxsdk.lynx:lynx-service-image:4.0.0"
    // image-service dependencies, if not added, images cannot be loaded; if the host APP needs to use other image libraries, you can customize the image-service and remove this dependency
    implementation "com.facebook.fresco:fresco:2.3.0"
    implementation "com.facebook.fresco:animated-gif:2.3.0"
    implementation "com.facebook.fresco:animated-webp:2.3.0"
    implementation "com.facebook.fresco:webpsupport:2.3.0"
    implementation "com.facebook.fresco:animated-base:2.3.0"
    implementation "com.squareup.okhttp3:okhttp:4.9.0"
    // integrating log-service
    implementation "org.lynxsdk.lynx:lynx-service-log:4.0.0"
    // integrating http-service
    implementation "org.lynxsdk.lynx:lynx-service-http:4.0.0"
    // 使用任意 XElement 时都需要。
    implementation "org.lynxsdk.lynx:xelement:4.0.0"
    // 仅在模板使用 <input> 或 <textarea> 时需要。
    implementation "org.lynxsdk.lynx:xelement-input:4.0.0"
    // 仅在模板使用 <overlay> 时需要。
    implementation "org.lynxsdk.lynx:xelement-overlay:4.0.0"
    // 仅在模板使用 <svg> 时需要;servalsvg 提供 SVG 渲染能力。
    implementation "org.lynxsdk.lynx:xelement-svg:4.0.0"
    implementation "org.lynxsdk.lynx:servalsvg:0.0.1-alpha.3"
    // 仅在模板使用 <markdown> 时需要;lynxtextra 提供原生文本排版能力,serval_markdown 提供 Markdown 渲染能力。
    implementation "org.lynxsdk.lynx:xelement-markdown:4.0.0"
    implementation "org.lynxsdk.lynx:lynxtextra:0.1.1"
    implementation "org.lynxsdk.lynx:serval_markdown:0.1.1"
    // 仅在模板使用 <viewpager> 时需要。
    implementation "org.lynxsdk.lynx:xelement-viewpager:4.0.0"
    // 仅在模板使用 scroll-coordinator 时需要。
    implementation "org.lynxsdk.lynx:xelement-scroll-coordinator:4.0.0"
    // 仅在模板使用下拉刷新时需要。
    implementation "org.lynxsdk.lynx:xelement-refresh:4.0.0"
    // 仅在模板使用 <blur-view> 时需要。
    implementation "org.lynxsdk.lynx:xelement-blur-view:4.0.0"
    // 仅在模板使用 <video> 时需要。
    implementation "org.lynxsdk.lynx:xelement-video:4.0.0"
    // 仅在模板使用 <webview> 时需要。
    implementation "org.lynxsdk.lynx:xelement-webview:4.0.0"
    // 仅在模板使用 AnimaX 动画时需要。
    implementation "org.lynxsdk.lynx:xelement-animax:4.0.0"
}dependencies {
// lynx dependencies
implementation("org.lynxsdk.lynx:lynx:4.0.0")
implementation("org.lynxsdk.lynx:lynx-jssdk:4.0.0")
implementation("org.lynxsdk.lynx:lynx-trace:4.0.0")
implementation("org.lynxsdk.lynx:primjs:4.0.0")
// integrating image-service
implementation("org.lynxsdk.lynx:lynx-service-image:4.0.0")
// image-service dependencies, if not added, images cannot be loaded; if the host APP needs to use other image libraries, you can customize the image-service and remove this dependency
implementation("com.facebook.fresco:fresco:2.3.0")
implementation("com.facebook.fresco:animated-gif:2.3.0")
implementation("com.facebook.fresco:animated-webp:2.3.0")
implementation("com.facebook.fresco:webpsupport:2.3.0")
implementation("com.facebook.fresco:animated-base:2.3.0")
// integrating log-service
implementation("org.lynxsdk.lynx:lynx-service-log:4.0.0")
// integrating http-service
implementation("org.lynxsdk.lynx:lynx-service-http:4.0.0")
implementation("com.squareup.okhttp3:okhttp:4.9.0")
// 使用任意 XElement 时都需要。
implementation("org.lynxsdk.lynx:xelement:4.0.0")
// 仅在模板使用 <input> 或 <textarea> 时需要。
implementation("org.lynxsdk.lynx:xelement-input:4.0.0")
// 仅在模板使用 <overlay> 时需要。
implementation("org.lynxsdk.lynx:xelement-overlay:4.0.0")
// 仅在模板使用 <svg> 时需要;servalsvg 提供 SVG 渲染能力。
implementation("org.lynxsdk.lynx:xelement-svg:4.0.0")
implementation("org.lynxsdk.lynx:servalsvg:0.0.1-alpha.3")
// 仅在模板使用 <markdown> 时需要;lynxtextra 提供原生文本排版能力,serval_markdown 提供 Markdown 渲染能力。
implementation("org.lynxsdk.lynx:xelement-markdown:4.0.0")
implementation("org.lynxsdk.lynx:lynxtextra:0.1.1")
implementation("org.lynxsdk.lynx:serval_markdown:0.1.1")
// 仅在模板使用 <viewpager> 时需要。
implementation("org.lynxsdk.lynx:xelement-viewpager:4.0.0")
// 仅在模板使用 scroll-coordinator 时需要。
implementation("org.lynxsdk.lynx:xelement-scroll-coordinator:4.0.0")
// 仅在模板使用下拉刷新时需要。
implementation("org.lynxsdk.lynx:xelement-refresh:4.0.0")
// 仅在模板使用 <blur-view> 时需要。
implementation("org.lynxsdk.lynx:xelement-blur-view:4.0.0")
// 仅在模板使用 <video> 时需要。
implementation("org.lynxsdk.lynx:xelement-video:4.0.0")
// 仅在模板使用 <webview> 时需要。
implementation("org.lynxsdk.lynx:xelement-webview:4.0.0")
// 仅在模板使用 AnimaX 动画时需要。
implementation("org.lynxsdk.lynx:xelement-animax:4.0.0")
}#配置混淆规则 (Proguard)
Lynx Engine 混淆规则如下,建议参考最新的源码配置:
# LYNX START
# use @Keep to annotate retained classes.
-dontwarn android.support.annotation.Keep
-keep @android.support.annotation.Keep class **
-keep @android.support.annotation.Keep class ** {
    @android.support.annotation.Keep <fields>;
    @android.support.annotation.Keep <methods>;
}
-dontwarn androidx.annotation.Keep
-keep @androidx.annotation.Keep class **
-keep @androidx.annotation.Keep class ** {
    @androidx.annotation.Keep <fields>;
    @androidx.annotation.Keep <methods>;
}
# native method call
-keepclasseswithmembers,includedescriptorclasses class * {
    native <methods>;
}
-keepclasseswithmembers class * {
    @com.lynx.tasm.base.CalledByNative <methods>;
}

# to customize a module, you need to keep the class name and the method annotated as LynxMethod.
-keepclasseswithmembers class * {
    @com.lynx.jsbridge.LynxMethod <methods>;
}

-keepclassmembers class *  {
    @com.lynx.tasm.behavior.LynxProp <methods>;
    @com.lynx.tasm.behavior.LynxPropGroup <methods>;
    @com.lynx.tasm.behavior.LynxUIMethod <methods>;
}

-keepclassmembers class com.lynx.tasm.behavior.ui.UIGroup {
    public boolean needCustomLayout();
}

# in case R8 compiler may remove mLoader in bytecode.
# as mLoader is not used in java and passed as a WeakRef in JNI.
-keepclassmembers class com.lynx.tasm.LynxTemplateRender {
    private com.lynx.tasm.core.resource.LynxResourceLoader mLoader;
    private com.lynx.tasm.core.resource.LynxResourceLoader mResourceLoader;
}

# the automatically generated setter classes use the class names of LynxBaseUI and ShadowNode and their subclasses.
-keep class com.lynx.tasm.behavior.ui.LynxBaseUI
-keep class com.lynx.tasm.behavior.shadow.ShadowNode
-keep class com.lynx.jsbridge.LynxModule { *; }
-keep class * extends com.lynx.tasm.behavior.ui.LynxBaseUI
-keep class * extends com.lynx.tasm.behavior.shadow.ShadowNode
-keep class * extends com.lynx.jsbridge.LynxModule { *; }
-keep class * extends com.lynx.jsbridge.LynxContextModule
-keep class * implements com.lynx.tasm.behavior.utils.Settable
-keep class * implements com.lynx.tasm.behavior.utils.LynxUISetter
-keep class * implements com.lynx.tasm.behavior.utils.LynxUIMethodInvoker
-keep class com.lynx.tasm.rendernode.compat.**{
    *;
}
-keep class com.lynx.tasm.rendernode.compat.RenderNodeFactory{
    *;
}
# LYNX END#2. 环境初始化
#LynxService 初始化
- Lynx Service 提供了宿主特性相关能力,推荐在应用的
Application#onCreate生命周期中完成 Lynx Service 的初始化; - Lynx Service 需主动注入;
Lynx 需要在应用启动时进行一些全局的初始化操作,请在 AndroidManifest.xml 文件中指定你自定义的 Application 类。
<application
  android:name=".YourApplication">
</application>import android.app.Application;
import com.facebook.drawee.backends.pipeline.Fresco;
import com.facebook.imagepipeline.core.ImagePipelineConfig;
import com.facebook.imagepipeline.memory.PoolConfig;
import com.facebook.imagepipeline.memory.PoolFactory;
import com.lynx.service.http.LynxHttpService;
import com.lynx.service.image.LynxImageService;
import com.lynx.service.log.LynxLogService;
import com.lynx.tasm.service.LynxServiceCenter;
public class YourApplication extends Application {
@Override
public void onCreate() {
super.onCreate();
initLynxService();
}
private void initLynxService() {
// init Fresco which is needed by LynxImageService
final PoolFactory factory = new PoolFactory(PoolConfig.newBuilder().build());
ImagePipelineConfig.Builder builder =
ImagePipelineConfig.newBuilder(getApplicationContext()).setPoolFactory(factory);
Fresco.initialize(getApplicationContext(), builder.build());
LynxServiceCenter.inst().registerService(LynxImageService.getInstance());
LynxServiceCenter.inst().registerService(LynxLogService.INSTANCE);
LynxServiceCenter.inst().registerService(LynxHttpService.INSTANCE);
}
}import android.app.Application
import com.facebook.drawee.backends.pipeline.Fresco
import com.facebook.imagepipeline.core.ImagePipelineConfig
import com.facebook.imagepipeline.memory.PoolConfig
import com.facebook.imagepipeline.memory.PoolFactory
import com.lynx.service.http.LynxHttpService
import com.lynx.service.image.LynxImageService
import com.lynx.service.log.LynxLogService
import com.lynx.tasm.service.LynxServiceCenter
class YourApplication : Application() {
override fun onCreate() {
super.onCreate()
initLynxService()
}
private fun initLynxService() {
// init Fresco which is needed by LynxImageService
val factory = PoolFactory(PoolConfig.newBuilder().build())
val builder = ImagePipelineConfig.newBuilder(applicationContext).setPoolFactory(factory)
Fresco.initialize(applicationContext, builder.build())
LynxServiceCenter.inst().registerService(LynxImageService.getInstance())
LynxServiceCenter.inst().registerService(LynxLogService)
LynxServiceCenter.inst().registerService(LynxHttpService)
}
}#LynxEnv 初始化
LynxEnv 提供了 Lynx Engine 的全局初始化接口, 请保证 LynxEnv 的初始化发生在 Lynx Engine 的任何接口调用之前; 推荐在应用的 Application#onCreate 生命周期中完成 LynxEnv 的初始化;
import com.lynx.tasm.LynxEnv;

public class YourApplication extends Application {

    @Override
    public void onCreate() {
        super.onCreate();
        initLynxService();
        initLynxEnv();
    }

    private void initLynxEnv() {
        LynxEnv.inst().init(
            this,
            null,
            null,
            null
        );
    }
}import com.lynx.tasm.LynxEnv
class YourApplication : Application() {
override fun onCreate() {
super.onCreate()
initLynxService()
initLynxEnv()
}
private fun initLynxEnv() {
LynxEnv.inst().init(
this,
null,
null,
null
)
}
}LynxEnv 初始化方法参数说明如下:
- appContext: 应用生命周期上下文对象,即 ApplicationContext;
- libraryLoader: 本地 so 文件加载器,默认可传 null,即使用系统默认加载器;
- templateProvider: 全局的 AppBundle 加载器,默认可传 null;
- behaviorBundle: 自定义组件列表,默认可传 null,如有定制化需求可参考自定义组件;
#3. 渲染 LynxView
#创建 Bundle 加载器
Lynx Engine 自身并没有集成下载资源的能力,因此需要宿主应用来提供 AbsTemplateProvider 的具体实现,并在构造 LynxView 时注入,Lynx 会采用注入的资源加载器来获取真实的 Bundle 内容。
你可以使用多种方式获取 Bundle 的资源内容,在这里我们选择将 Bundle 的内容内置在应用中:
- 首先请将快速上手阶段生成的 Bundle 文件放置在 src/main/assets 目录下,或者你可以将下面的文件下载到本机上并放置在同样目录下:
app
└── src
    └── main
        ├── java
        ├── res
        └── assets
└── main.lynx.bundle- 实现 Bundle 加载器
import android.content.Context;
import com.lynx.tasm.provider.AbsTemplateProvider;
import java.io.ByteArrayOutputStream;
import java.io.IOException;
import java.io.InputStream;

public class DemoTemplateProvider extends AbsTemplateProvider {
    private Context mContext;

    DemoTemplateProvider(Context context) {
        this.mContext = context.getApplicationContext();
    }

    @Override
    public void loadTemplate(String uri, Callback callback) {
        new Thread(new Runnable() {
            @Override
            public void run() {
                try (InputStream inputStream = mContext.getAssets().open(uri);
                     ByteArrayOutputStream byteArrayOutputStream = new ByteArrayOutputStream()) {
                    byte[] buffer = new byte[1024];
                    int length;
                    while ((length = inputStream.read(buffer)) != -1) {
                        byteArrayOutputStream.write(buffer, 0, length);
                    }
                    callback.onSuccess(byteArrayOutputStream.toByteArray());
                } catch (IOException e) {
                    callback.onFailed(e.getMessage());
                }
            }
        }).start();
    }
}import android.content.Context
import com.lynx.tasm.provider.AbsTemplateProvider
import java.io.ByteArrayOutputStream
import java.io.IOException
class DemoTemplateProvider(context: Context) : AbsTemplateProvider() {
private var mContext: Context = context.applicationContext
override fun loadTemplate(uri: String, callback: Callback) {
Thread {
try {
mContext.assets.open(uri).use { inputStream ->
ByteArrayOutputStream().use { byteArrayOutputStream ->
val buffer = ByteArray(1024)
var length: Int
while ((inputStream.read(buffer).also { length = it }) != -1) {
byteArrayOutputStream.write(buffer, 0, length)
}
callback.onSuccess(byteArrayOutputStream.toByteArray())
}
}
} catch (e: IOException) {
callback.onFailed(e.message)
}
}.start()
}
}#构造 LynxView
LynxView 是 Lynx Engine 提供的渲染基本单元,LynxView 是继承自 Android 原生 View,你可以快速的构造一个 LynxView,并将其任意添加到原生 Android 视图树上。
import android.app.Activity;
import android.os.Bundle;

import com.lynx.tasm.LynxView;
import com.lynx.tasm.LynxViewBuilder;

public class MainActivity extends Activity {

    @Override
    protected void onCreate(Bundle savedInstanceState) {
        super.onCreate(savedInstanceState);
        LynxView lynxView = buildLynxView();
        setContentView(lynxView);
    }

    private LynxView buildLynxView() {
        LynxViewBuilder viewBuilder = new LynxViewBuilder();
        viewBuilder.setTemplateProvider(new DemoTemplateProvider(this));
        return viewBuilder.build(this);
    }
}import android.app.Activity
import android.os.Bundle
import com.lynx.tasm.LynxView
import com.lynx.tasm.LynxViewBuilder
class MainActivity : Activity() {
override fun onCreate(savedInstanceState: Bundle?) {
super.onCreate(savedInstanceState)
val lynxView = buildLynxView()
setContentView(lynxView)
}
private fun buildLynxView(): LynxView {
val viewBuilder: LynxViewBuilder = LynxViewBuilder()
viewBuilder.setTemplateProvider(DemoTemplateProvider(this))
return viewBuilder.build(this)
}
}#引入 XElement
XElement 需要额外在LynxViewBuilder 中被引入:
import android.app.Activity;
import android.os.Bundle;

import com.lynx.tasm.LynxView;
import com.lynx.tasm.LynxViewBuilder;
import com.lynx.xelement.XElementBehaviors;

public class MainActivity extends Activity {

    @Override
    protected void onCreate(Bundle savedInstanceState) {
        super.onCreate(savedInstanceState);
        LynxView lynxView = buildLynxView();
        setContentView(lynxView);
    }

    private LynxView buildLynxView() {
        LynxViewBuilder viewBuilder = new LynxViewBuilder();
        viewBuilder.addBehaviors(new XElementBehaviors().create());
        viewBuilder.setTemplateProvider(new DemoTemplateProvider(this));
        return viewBuilder.build(this);
    }
}import android.app.Activity
import android.os.Bundle
import com.lynx.tasm.LynxView
import com.lynx.tasm.LynxViewBuilder
import com.lynx.xelement.XElementBehaviors
class MainActivity : Activity() {
override fun onCreate(savedInstanceState: Bundle?) {
super.onCreate(savedInstanceState)
val lynxView = buildLynxView()
setContentView(lynxView)
}
private fun buildLynxView(): LynxView {
val viewBuilder: LynxViewBuilder = LynxViewBuilder()
viewBuilder.addBehaviors(XElementBehaviors().create())
viewBuilder.setTemplateProvider(DemoTemplateProvider(this))
return viewBuilder.build(this)
}
}#渲染视图
当你完成以上步骤之后,已经完成了 LynxView 创建与资源读取的全部工作,调用 lynxView.renderTemplateUrl 方法,即可将对应的 Bundle 内容渲染到 LynxView 视图上。
public class MainActivity extends Activity {

    @Override
    protected void onCreate(Bundle savedInstanceState) {
        super.onCreate(savedInstanceState);
        LynxView lynxView = buildLynxView();
        setContentView(lynxView);

        String url = "main.lynx.bundle";
        lynxView.renderTemplateUrl(url, "");
    }
}class MainActivity : Activity() {
override fun onCreate(savedInstanceState: Bundle?) {
super.onCreate(savedInstanceState)
val lynxView = buildLynxView()
setContentView(lynxView)
val uri = "main.lynx.bundle";
lynxView.renderTemplateUrl(uri, "")
}
}然后你将在屏幕上看到如下内容:
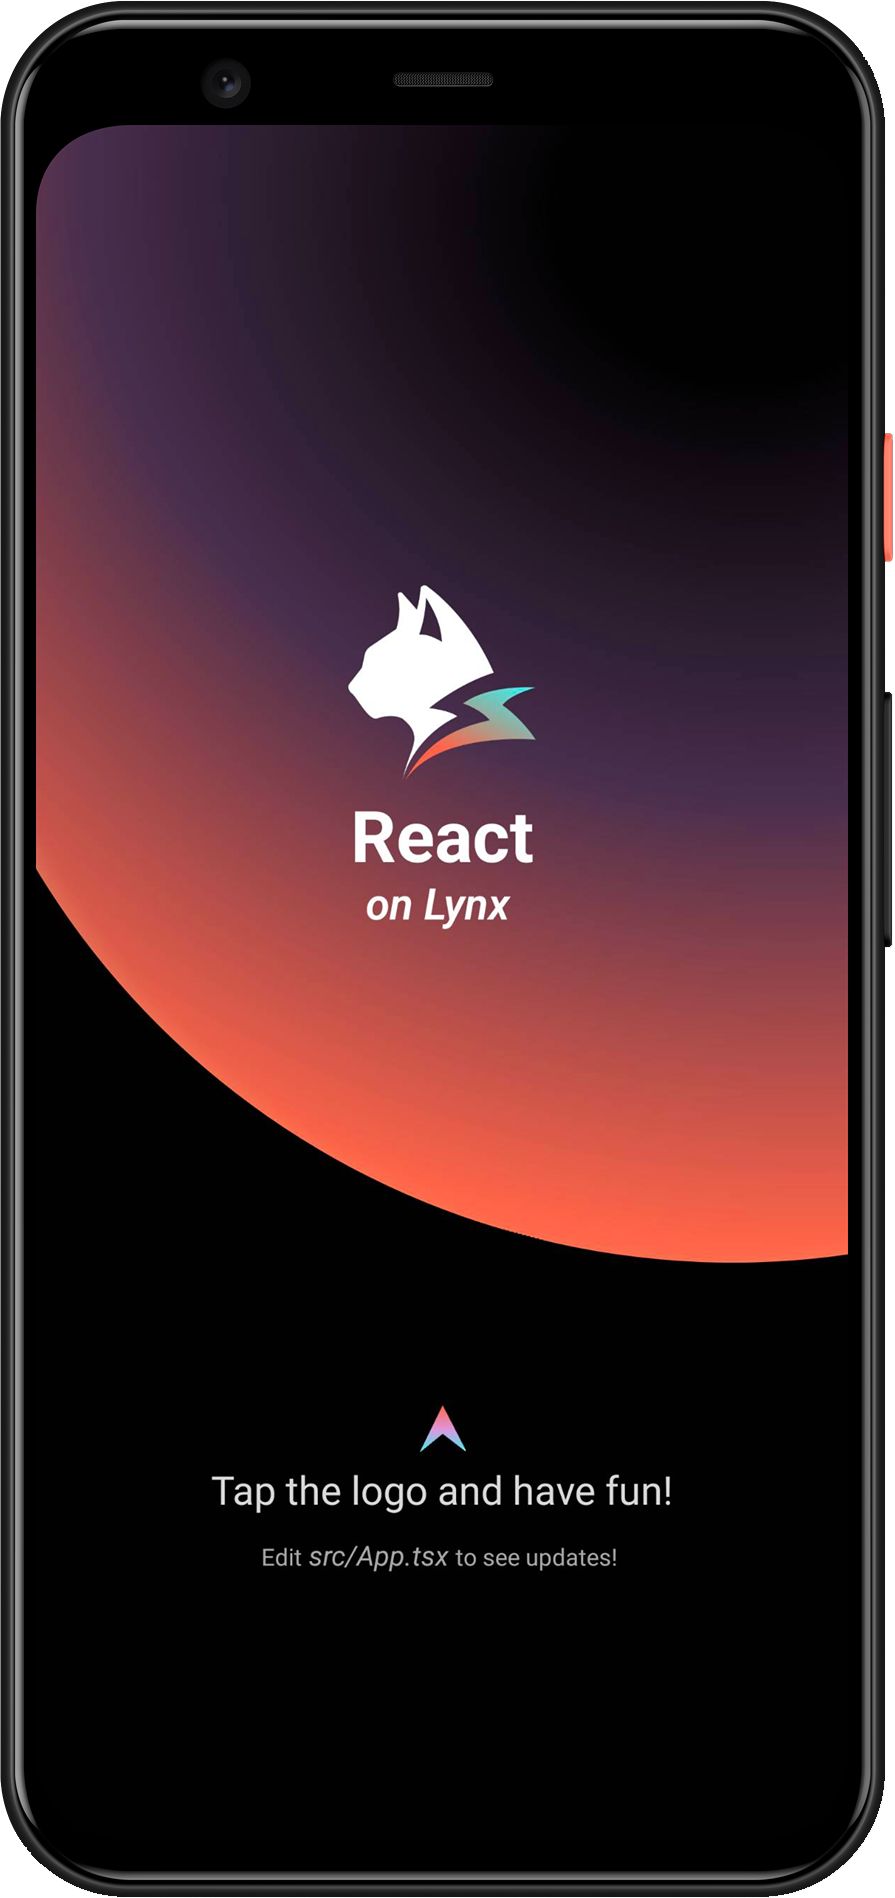
恭喜你,现在你现在已经完成了 Lynx Engine 集成的全部工作!
#4. 进入 Lynx 世界
#将 Lynx 集成到 Harmony 平台
- 本文假设你已熟悉原生 Harmony 应用开发的基本概念。
- 下文中的所有代码,你都可以参考项目:integrating-lynx-demo-projects。
#1. 依赖配置
#包依赖
- Lynx
Lynx Engine 核心能力,包含了解析 Bundle、样式解析、排版以及渲染视图等基础能力,以及 Lynx 页面依赖的 JavaScript 运行时基础代码。
"dependencies": {
  "@ohos/imageknife": "3.2.6",
  "@lynx/lynx": "3.8.1",
  "@lynx/primjs": "3.8.0",
},- Lynx Service
Lynx Service 包括 LynxDevtoolService、LynxLogService 等,旨在提供一些宿主应用特性强相关的能力,允许宿主应用在运行时注入自定义实现,也可以使用 Lynx 提供的默认实现。例如 LynxHttpService 默认是使用鸿蒙内置的 http 模块实现。Lynx 提供了标准的原生 Log、Http 服务的能力,接入方可以快速接入并使用;
"dependencies": {
  "@ohos/imageknife": "3.2.6",
  "@lynx/lynx": "3.8.1",
  "@lynx/lynx_devtool": "3.8.1",
  "@lynx/lynx_devtool_service": "3.8.1",
  "@lynx/lynx_http_service": "3.8.1",
  "@lynx/lynx_log_service": "3.8.1",
  "@lynx/primjs": "3.8.0",
},#能力依赖
- Native C++ 配置
为了引入 libc++_shared.so 需要进行 Native C++ 相关配置,需要定义 CMakeLists.txt。
# the minimum version of CMake.
cmake_minimum_required(VERSION 3.5.0)
project(MyApplication)
并且修改 entry/build-profile.json5 中的 buildOptions
{
  buildOption: {
    externalNativeOptions: {
      path: './src/main/cpp/CMakeLists.txt',
      arguments: '',
      cppFlags: '',
    },
  },
}- 网络请求配置
如果需要请求网络资源,请在 module.json5 配置 requestPermissions 来启用网络请求。
{
  module: {
    requestPermissions: [
      {
        name: 'ohos.permission.INTERNET',
        reason: '$string:network',
        usedScene: {
          abilities: ['FormAbility'],
          when: 'inuse',
        },
      },
    ],
  },
}
并且在 entry/src/main/resources/base/element/string.json 中配置 network 关键字段。
{
  "string": [
    {
      "name": "network",
      "value": "Request network"
    }
  ]
}- XElement 依赖配置
"dependencies": {
  "@lynx/xelement_svg": "3.6.0",
},#2. 环境初始化
#LynxService 初始化
- Lynx Service 提供了宿主特性相关能力,推荐在应用的
UIAbility#onCreate生命周期中完成 Lynx Service 的初始化; - Lynx Service 需主动注入;
import { LLog, LynxServiceCenter, LynxEnv, LynxServiceType } from '@lynx/lynx';
import { LynxDevToolService } from '@lynx/lynx_devtool_service';
import { LynxLogService } from '@lynx/lynx_log_service';
import { LynxHttpService } from '@lynx/lynx_http_service';

export default class EntryAbility extends UIAbility {
  onCreate(want: Want, launchParam: AbilityConstant.LaunchParam): void {
    // Init LynxDevtoolService
    LynxServiceCenter.registerService(
      LynxServiceType.DevTool,
      LynxDevToolService.instance,
    );
    // Init LynxHttpService
    LynxServiceCenter.registerService(
      LynxServiceType.Http,
      LynxHttpService.instance,
    );
    // Init LynxLogService

    LynxServiceCenter.registerService(
      LynxServiceType.Log,
      LynxLogService.instance,
    );
  }
}#LynxEnv 初始化
LynxEnv 提供了 Lynx Engine 的全局初始化接口。请保证 LynxEnv 的初始化发生在 Lynx Engine 的任何接口调用之前;例如可以在 EntryAbility#onCreate 生命周期中完成 LynxEnv 的初始化。
import { LLog, LynxEnv } from '@lynx/lynx';

export default class EntryAbility extends UIAbility {
  onCreate(want: Want, launchParam: AbilityConstant.LaunchParam): void {
    // Init LynxService
    // ...
    // Init LynxEnv
    LLog.useSysLog(true);
    LynxEnv.initialize(this.context);
    let options = new Map<string, string>();
    options.set('App', 'LynxExplorer');
    options.set('AppVersion', '0.0.1');
    LynxEnv.setAppInfo(options);
    LynxEnv.enableDevtool(true);
  }
}#3.渲染 LynxView
#创建 Bundle 加载器
Lynx Engine 自身并没有集成下载资源的能力,因此需要宿主应用来提供 LynxResourceProvider 的具体实现,并在构造 LynxView 时注入,Lynx 会采用注入的资源加载器来获取真实的 Bundle 内容。
你可以使用多种方式获取 Bundle 的资源内容,在这里我们选择将 Bundle 的内容内置在应用中:
首先请将快速上手阶段生成的 Bundle 文件放置在 src/main/resources/rawfile 目录下;或者你可以将下面的文件下载到本机上并放置在同样目录下;
entry
└── src
    └── main
        └── resources
            └── rawfile
└── main.lynx.bundle- LynxTemplateResourceFetcher
LynxTemplateResourceFetcher 提供了 Bundle 模板资源的加载能力,你需要实现 fetchTemplate 方法来完成 Bundle 模板资源的加载。
import {
  LLog,
  LynxResourceRequest,
  LynxTemplateResourceFetcher,
  TemplateProviderResult,
} from '@lynx/lynx';
import { AsyncCallback, BusinessError } from '@ohos.base';
import http from '@ohos.net.http';
import resourceManager from '@ohos.resourceManager';

export class ExampleTemplateResourceFetcher extends LynxTemplateResourceFetcher {
  fetchTemplate(
    request: LynxResourceRequest,
    callback: AsyncCallback<TemplateProviderResult, void>,
  ) {
    if (request.url.startsWith('http')) {
      let httpRequest = http.createHttp();
      httpRequest.request(
        request.url,
        {
          expectDataType: http.HttpDataType.ARRAY_BUFFER,
        },
        (err: BusinessError, data: http.HttpResponse) => {
          callback(err, {
            binary: data?.result as ArrayBuffer,
          });
          httpRequest.destroy();
        },
      );
    } else {
      // local file
      const context: Context = getContext(this);
      const resourceMgr: resourceManager.ResourceManager =
        context.resourceManager;
      resourceMgr.getRawFileContent(
        request.url,
        (err: BusinessError, data: Uint8Array) => {
          callback(err, {
            binary: data?.buffer as ArrayBuffer,
          });
        },
      );
    }
  }

  fetchSSRData(
    request: LynxResourceRequest,
    callback: AsyncCallback<ArrayBuffer, void>,
  ) {
    let httpRequest = http.createHttp();
    httpRequest.request(
      request.url,
      {
        expectDataType: http.HttpDataType.ARRAY_BUFFER,
      },
      (err: BusinessError, data: http.HttpResponse) => {
        callback(err, data?.result as ArrayBuffer);
        httpRequest.destroy();
      },
    );
  }
}- LynxMediaResourceFetcher
LynxMediaResourceFetcher 提供了媒体资源的加载能力。
import {
  LynxMediaResourceFetcher,
  LynxResourceRequest,
  LynxOptionalBool,
} from '@lynx/lynx';

export class ExampleMediaResourceFetcher extends LynxMediaResourceFetcher {
  shouldRedirectUrl(request: LynxResourceRequest): string {
    // just return the input url;
    return request.url;
  }

  isLocalResource(url: string): LynxOptionalBool {
    return LynxOptionalBool.UNDEFINED;
  }
}- LynxGenericResourceFetcher
LynxGenericResourceFetcher 提供了通用资源的加载能力,你需要实现 fetchResource 方法来完成通用资源的加载。
import {
  LynxError,
  LynxSubErrorCode,
  LynxGenericResourceFetcher,
  LynxResourceRequest,
  LynxResourceType,
  LynxStreamDelegate,
} from '@lynx/lynx';
import { AsyncCallback, BusinessError } from '@ohos.base';
import http from '@ohos.net.http';
import { ImageKnife, ImageKnifeOption, CacheStrategy } from '@ohos/imageknife';

export class ExampleGenericResourceFetcher extends LynxGenericResourceFetcher {
  fetchResource(
    request: LynxResourceRequest,
    callback: AsyncCallback<ArrayBuffer, void>,
  ): void {
    let httpRequest = http.createHttp();
    httpRequest.request(
      request.url,
      {
        expectDataType: http.HttpDataType.ARRAY_BUFFER,
      },
      (err: BusinessError, data: http.HttpResponse) => {
        callback(err, data?.result as ArrayBuffer);
        httpRequest.destroy();
      },
    );
  }

  fetchResourcePath(
    request: LynxResourceRequest,
    callback: AsyncCallback<string, void>,
  ): void {
    if (request.type === LynxResourceType.LYNX_RESOURCE_TYPE_IMAGE) {
      let option = new ImageKnifeOption();
      option.loadSrc = request.url;
      option.writeCacheStrategy = CacheStrategy.File;
      let error: BusinessError | undefined = undefined;
      ImageKnife.getInstance()
        .preLoadCache(option)
        .then((data: string) => {
          if (data.length > 0) {
            callback(error, data);
          } else {
            error = {
              code: LynxSubErrorCode.E_RESOURCE_IMAGE_PIC_SOURCE,
              message: 'Image path is invalid',
              name: 'Image Error',
            };
            callback(error, '');
          }
        })
        .catch((e: string) => {
          error = {
            code: LynxSubErrorCode.E_RESOURCE_IMAGE_FROM_NETWORK_OR_OTHERS,
            message: e,
            name: 'Image Error',
          };
          callback(error, '');
        });
    } else {
      callback(
        {
          code: LynxError.LYNX_ERROR_CODE_RESOURCE,
          message: 'unsupported type: ' + request.type,
          name: 'Resource Error',
        },
        '',
      );
    }
  }

  fetchStream(
    request: LynxResourceRequest,
    delegate: LynxStreamDelegate,
  ): void {
    // TODO(Lynx): support fetching stream.
    delegate.onStart(100);
    let a = new ArrayBuffer(10);
    delegate.onData(a, 0, 10);
    delegate.onEnd();
  }

  cancel(request: LynxResourceRequest): void {
    // TODO(Lynx)
  }
}#构造 LynxView 并渲染视图
当你完成以上步骤之后,已经完成了 LynxView 创建与资源读取的全部工作,即可将对应的 Bundle 内容渲染到 LynxView 视图上。
import {
  LynxTemplateResourceFetcher,
  LynxMediaResourceFetcher,
  LynxGenericResourceFetcher,
  LynxView,
} from '@lynx/lynx';

import { ExampleTemplateResourceFetcher } from '../provider/ExampleTemplateResourceFetcher';
import { ExampleMediaResourceFetcher } from '../provider/ExampleMediaResourceFetcher';
import { ExampleGenericResourceFetcher } from  '../provider/ExampleGenericResourceFetcher';

@Entry
@Component
struct Index {
  templateResourceFetcher: LynxTemplateResourceFetcher = new ExampleTemplateResourceFetcher();
  mediaResourceFetcher: LynxMediaResourceFetcher = new ExampleMediaResourceFetcher();
  genericResourceFetcher: LynxGenericResourceFetcher = new ExampleGenericResourceFetcher();
  private url: string = 'your bundle file';

  build() {
    Column() {
      LynxView({
        templateResourceFetcher: this.templateResourceFetcher,
        mediaResourceFetcher: this.mediaResourceFetcher,
        genericResourceFetcher: this.genericResourceFetcher,
        url: this.url,
      }).width('100%').height('100%');
    }
    .size({ width: '100%', height: '100%' })
  }
}
然后你将在屏幕上看到如下内容:
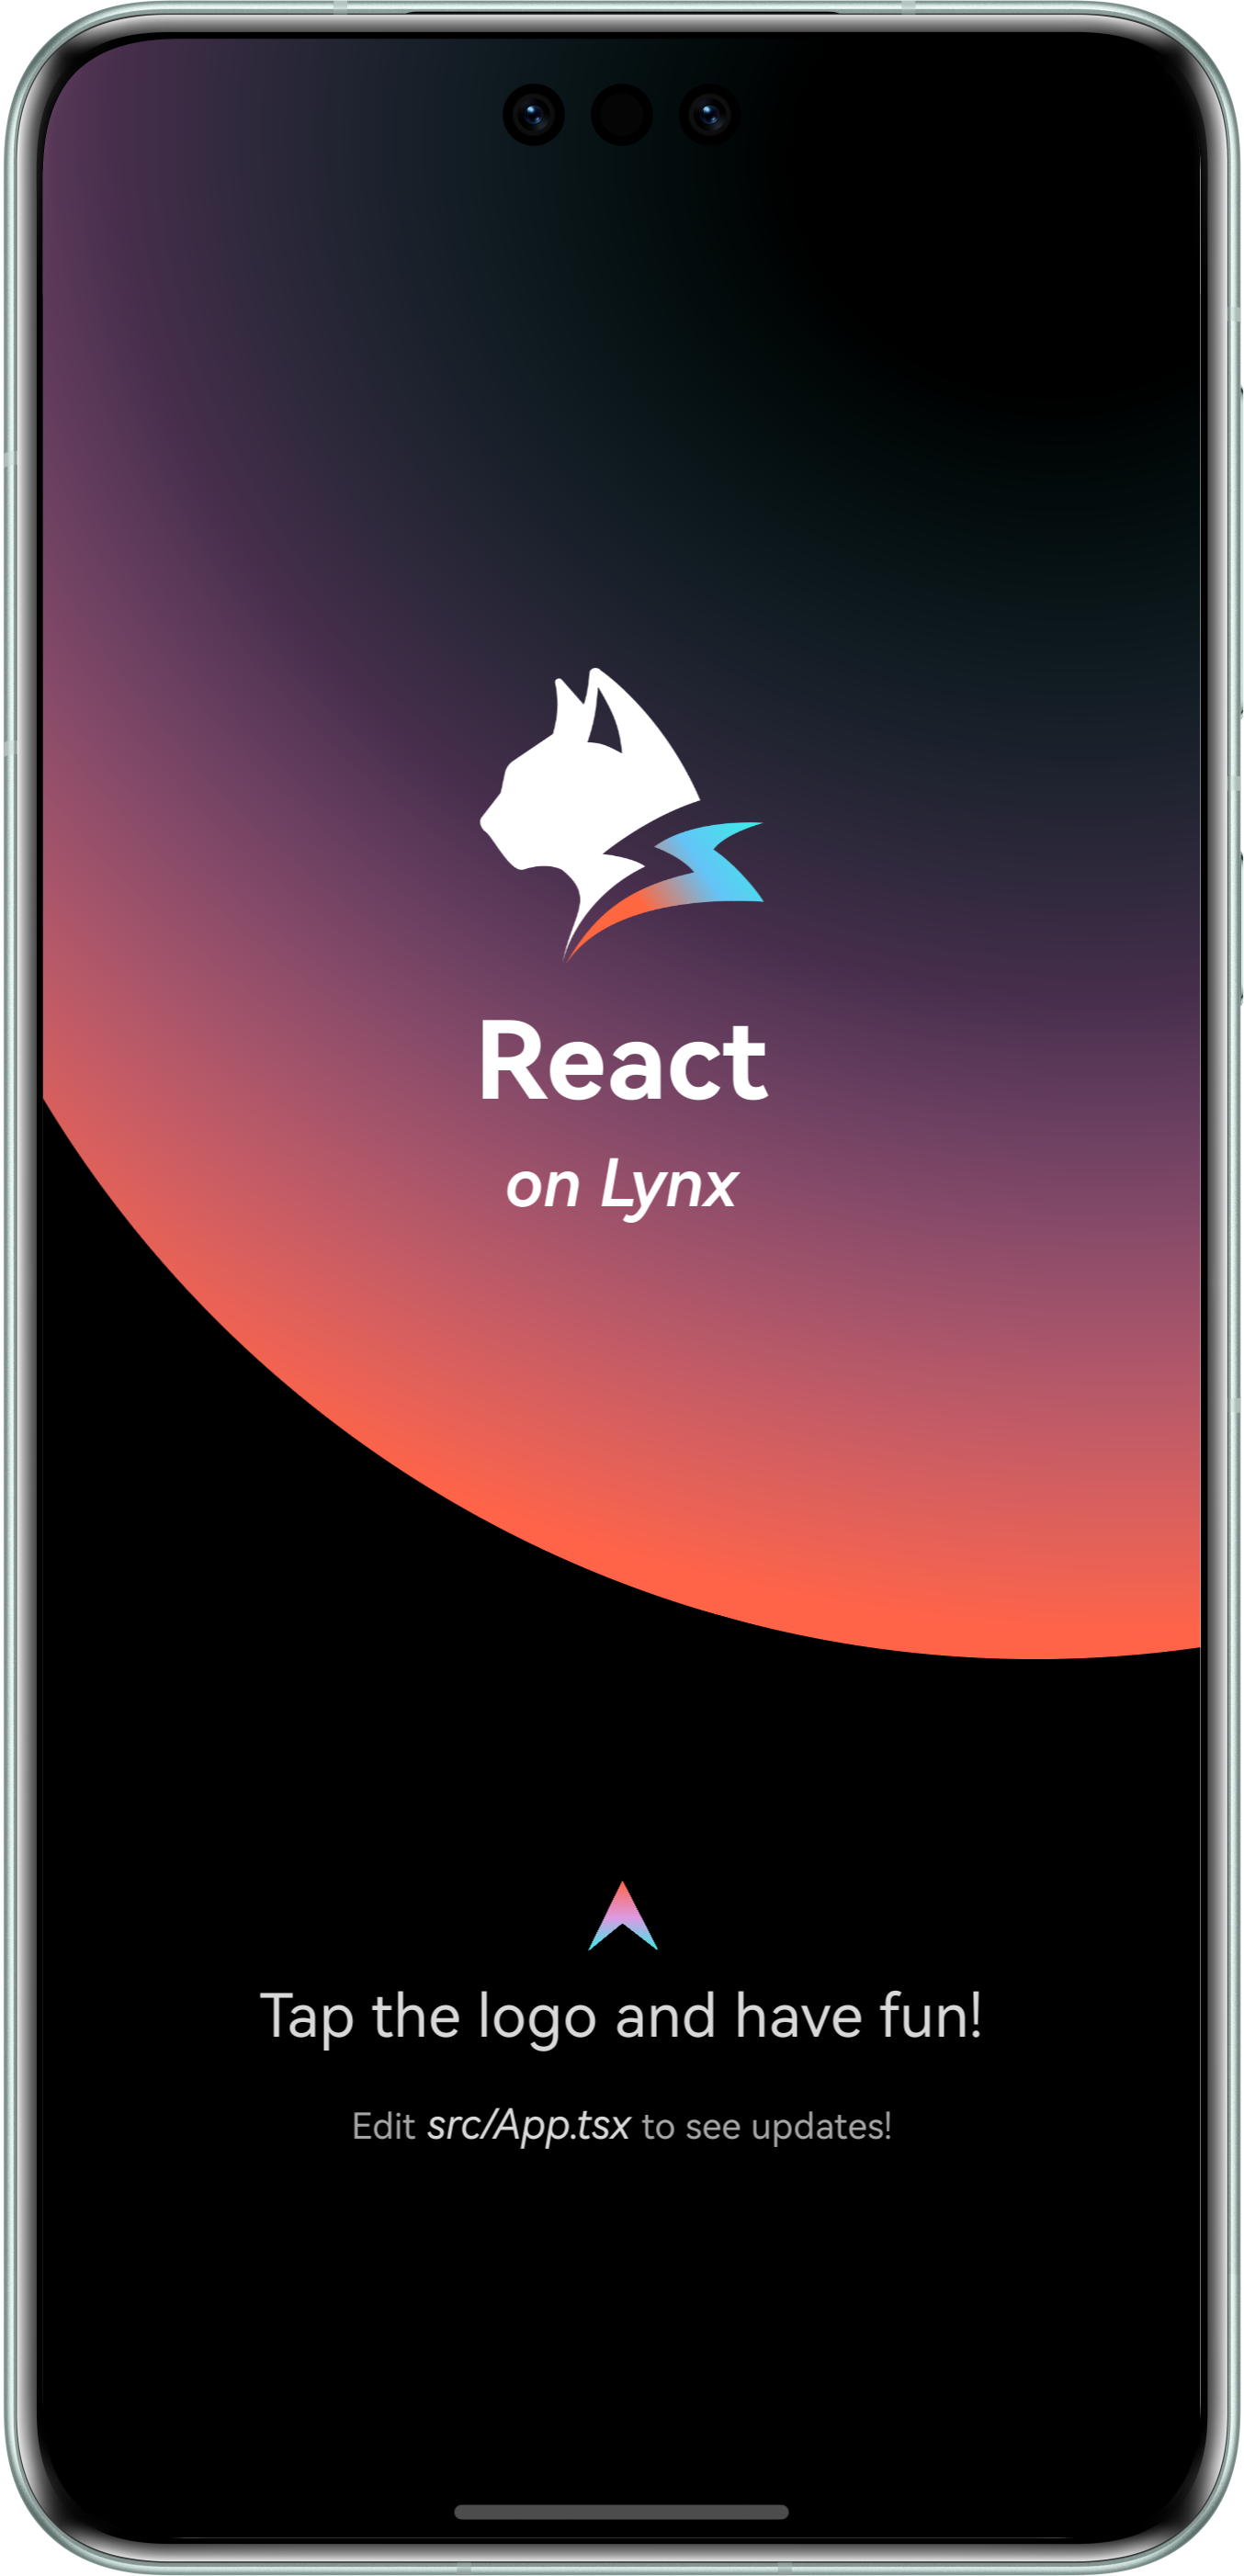
恭喜你,现在你现在已经完成了 Lynx Engine 集成的全部工作!
#4. 进入 Lynx 世界
#将 Lynx 集成到 Web 平台
Lynx for Web 在 Web 浏览器中实现了 Lynx 引擎。通过 Lynx for Web,你可以轻松地将 Lynx 应用集成到任何现有的 Web 项目中,无论该项目使用的是 React、Vue、Svelte 还是纯 HTML。
#1. 开发调试
我们需要你已经阅读并按照快速开始创建了一个 Lynx 项目。
#添加 web 配置
- 进入 Lynx 项目:
cd <lynx-project-name>lynx.config.ts增加 web 配置(environments.web):
import { defineConfig } from '@lynx-js/rspeedy';
import { pluginReactLynx } from '@lynx-js/react-rsbuild-plugin';

export default defineConfig({
  plugins: [pluginReactLynx()],
  environments: {
    web: {},
    lynx: {},
  },
});#启动开发服务器
执行:
npm run devyarn run devpnpm run devbun run devdeno run npm:dev即可在本地访问开发页面。
#构建与预览
你也可以使用 Web Explorer 来快速预览生产模式下的某个页面的 web bundle。
首先,执行构建:
npm run buildyarn run buildpnpm run buildbun run builddeno run npm:build你将会看到项目中多出了 dist/main.web.bundle 文件,它就是最终的 web 构建产物。
打开 Lynx Explorer Web 版,填写你的产物可访问的 URL,即可看到生产模式下的效果。
#2. 接入 web 项目
目前你已经有了一份 Lynx for Web 构建产物,接下来我们需要创建一个 web 工程去使用它,这里使用 Rsbuild。
#创建一个 web 项目
在上述的 Lynx 项目同级,创建一个新的工程,执行:
npm create rsbuild@latestyarn create rsbuildpnpm create rsbuild@latestbun create rsbuild@latestdeno init --npm rsbuild@latest跟随提示来创建一个 React 项目。
#配置工程
- 进入 Web 项目:
cd <web-project-name>- 安装依赖:
npm install @lynx-js/web-coreyarn add @lynx-js/web-corepnpm add @lynx-js/web-corebun add @lynx-js/web-coredeno add npm:@lynx-js/web-core- 在
src/App.tsx引入这些依赖:
import './App.css';
import '@lynx-js/web-core/client';
import type { LynxViewElement as LynxView } from '@lynx-js/web-core/client';

const App = () => {
  return (
    <lynx-view
      style={{ height: '100vh', width: '100vw' }}
      url="/main.web.bundle"
    ></lynx-view>
  );
};

export default App;- 更新
rsbuild.config.ts
server.publicDir 需要更换为你实际的 Lynx 项目路径。
import { defineConfig } from '@rsbuild/core';
import { pluginReact } from '@rsbuild/plugin-react';
import path from 'node:path';
import { fileURLToPath } from 'node:url';
const __filename = fileURLToPath(import.meta.url);
const __dirname = path.dirname(__filename);

export default defineConfig({
  plugins: [pluginReact()],
  server: {
    publicDir: [
      {
        name: path.join(
          __dirname,
          '../',
          // 这里请替换为你实际的 Lynx 项目名称
          'lynx-project',
          'dist',
        ),
      },
    ],
  },
});#启动工程
执行:
npm run devyarn run devpnpm run devbun run devdeno run npm:dev访问 http://localhost:3000 即能看到你的 Lynx 应用。
#3. API 参考
更多 API 细节请参阅 LynxView。
#将 Lynx 集成到 Windows 平台
- 本文假设你已熟悉原生 Windows 应用开发的基本概念。
- 你也可以参考官方的 LynxExplorer 项目。
#1. 依赖配置
#下载或构建 LynxSDK
- 可以从 GitHub Release 4.0.0 下载预编译的LynxSDK。
- 解压下载的LynxSDK到你项目的目录下,比如
thirdparty目录。
或者,你可以按照 为Windows构建 Lynx Explorer 指南从源代码构建。
#配置CMake
本文假设你已有一个基于CMake的Windows原生项目,并且希望集成Lynx能力。如果你使用的其它构建系统,你可以参考本文内容,并自行集成。
- 基于你的项目,设置CMake基本配置。
# Set the C++ standard to at least 17 if you are using the C++ wrapper apis of LynxSDK.
set(CMAKE_CXX_STANDARD 17)
set(CMAKE_CXX_STANDARD_REQUIRED ON)- 配置LynxSDK相关内容。
set(LYNX_LIB_PATH ${CMAKE_CURRENT_SOURCE_DIR}/thirdparty/lynx) # Or your location of LynxSDK
# Set include directory of LynxSDK.
include_directories(${LYNX_LIB_PATH}/include)
# Set library of LynxSDK that needs to be linked.
target_link_libraries(${PROJECT_NAME} ${LYNX_LIB_PATH}/lib/lynx.dll.lib)- 添加自定义命令,用于在构建应用之后,拷贝必须的数据和资源到应用包。
# 拷贝 lynx.dll 到输出目录
add_custom_command(TARGET ${PROJECT_NAME} POST_BUILD
    COMMAND ${CMAKE_COMMAND} -E copy_if_different
        ${CMAKE_CURRENT_SOURCE_DIR}/thirdparty/lynx/lib/lynx.dll
        $<TARGET_FILE_DIR:${PROJECT_NAME}>)
# 拷贝 data 到输出目录
add_custom_command(TARGET ${PROJECT_NAME} POST_BUILD
    COMMAND ${CMAKE_COMMAND} -E copy_directory
        ${CMAKE_CURRENT_SOURCE_DIR}/thirdparty/lynx/data
        $<TARGET_FILE_DIR:${PROJECT_NAME}>/data)
# 拷贝 lynx_core.js 到输出目录
add_custom_command(TARGET ${PROJECT_NAME} POST_BUILD
    COMMAND ${CMAKE_COMMAND} -E copy_if_different
        ${CMAKE_CURRENT_SOURCE_DIR}/thirdparty/lynx/lynx_core.js
        $<TARGET_FILE_DIR:${PROJECT_NAME}>)
# 拷贝 lynx_core_dev.js 到输出目录
add_custom_command(TARGET ${PROJECT_NAME} POST_BUILD
    COMMAND ${CMAKE_COMMAND} -E copy_if_different
        ${CMAKE_CURRENT_SOURCE_DIR}/thirdparty/lynx/lynx_core_dev.js
$<TARGET_FILE_DIR:${PROJECT_NAME}>)#2. 环境初始化 - 可选
#Lynx Service 初始化
- Lynx Service 旨在提供一些宿主应用特性强相关的能力,允许宿主应用在运行时注入自定义实现,推荐在LynxView创建之前完成 Lynx Service 的初始化。
- Lynx Service 需主动注入。
#include "lynx_env.h"
#include "lynx_http_service.h"
#include "lynx_view.h"
#include "lynx_generic_resource_fetcher.h"

// Implements the http service if needed.
class LynxHttpServiceImpl : public lynx::pub::LynxHttpService {
public:
LynxHttpServiceImpl() = default;
~LynxHttpServiceImpl() = default;

void Request(std::shared_ptr<lynx::pub::LynxHttpRequest> request,
std::shared_ptr<lynx::pub::LynxHttpResponse> response) override {
// TODO
}

};

int WINAPI WinMain(HINSTANCE hInstance, HINSTANCE hPrevInstance, LPSTR lpCmdLine, int nCmdShow) {
// Register http service for lynx.fetch.
lynx::pub::LynxServiceCenter::GetInstance().
RegisterService(std::make_shared<LynxHttpServiceImpl>());

// TODO: create window and construct LynxView.

return 0;
}
#LynxEnv 初始化
LynxEnv 提供了 Lynx Engine 的全局初始化接口, 请保证 LynxEnv 的初始化发生在 Lynx Engine 的任何接口调用之前。
#include <windows.h>

#include "lynx_env.h"
#include "lynx_http_service.h"
#include "lynx_view.h"
#include "lynx_generic_resource_fetcher.h"

int WINAPI WinMain(HINSTANCE hInstance, HINSTANCE hPrevInstance, LPSTR lpCmdLine, int nCmdShow) {
    // Register http service for lynx.fetch.
  lynx::pub::LynxServiceCenter::GetInstance().
    RegisterService(std::make_shared<LynxHttpServiceImpl>());

  // Initialize LynxEnv
  auto& lynx_env = lynx::pub::LynxEnv::GetInstance();
  // Enable devtool.
  lynx_env.SetDevtoolEnabled(true);
  lynx_env.SetDevtoolAppInfo("App", "LynxExplorer");
  lynx_env.SetDevtoolAppInfo("AppVersion", "1.0.0");
  // Register global native module if needed.
  lynx_env.RegisterNativeModule("ExplorerModule", ExplorerModuleCreator,
                            nullptr);

  // TODO: create window and construct LynxView.

  return 0;
}
#3. 渲染 LynxView
#创建资源加载器
Lynx Engine 自身并没有集成下载资源的能力,因此需要宿主应用来提供 LynxGenericResourceFetcher 的具体实现,并在构造 LynxView 时注入,Lynx 会采用注入的资源加载器来获取真实的 Bundle 内容。
你可以使用多种方式获取 Bundle 的资源内容,在这里我们选择通过本地文件加载 Bundle 的内容。
请先下载下面的Bundle文件到本地。
实现 Resource Fetcher (可选)
#include "lynx_env.h"
#include "lynx_http_service.h"
#include "lynx_view.h"
#include "lynx_generic_resource_fetcher.h"

class ExampleGenericResourceFetcher : public lynx::pub::LynxGenericResourceFetcher {
public:
void FetchResource(
std::shared_ptr<lynx::pub::LynxResourceRequest> request,
std::shared_ptr<lynx::pub::LynxResourceResponse> response) override {
// Implements fetching logic if you want to load Bundle from net.
}
};
#构造 LynxView
LynxView 是 Lynx Engine 提供的渲染基本单元,你可以快速的构造一个 LynxView,并通过设置一个窗口句柄作为父窗口容器。
#include <windows.h>

#include "lynx_env.h"
#include "lynx_http_service.h"
#include "lynx_view.h"
#include "lynx_generic_resource_fetcher.h"

int WINAPI WinMain(HINSTANCE hInstance, HINSTANCE hPrevInstance, LPSTR lpCmdLine, int nCmdShow) {
  // TODO: create window.

  // Construct LynxView.
  lynx::pub::LynxView::Builder builder;
  builder.SetScreenSize(800, 600, 1.0)
      .SetFrame(0, 0, 800, 600)
      .SetParent(hwnd);
  // Set Resource fetcher if needed.
  // builder.SetGenericResourceFetcher(std::make_shared<ExampleGenericResourceFetcher>());
  auto lynx_view = builder.Build();

  // Run message.
  MSG msg = {0};
  while (GetMessage(&msg, NULL, 0, 0)) {
    TranslateMessage(&msg);
    DispatchMessage(&msg);
  }
  return 0;
}
#渲染视图
当你完成以上步骤之后,已经完成了 LynxView 创建与资源读取的全部工作,调用 lynxView->LoadTemplate 方法,即可将对应的 Bundle 内容渲染到 LynxView 视图上。
#include <windows.h>

#include "lynx_env.h"
#include "lynx_http_service.h"
#include "lynx_view.h"
#include "lynx_generic_resource_fetcher.h"

int WINAPI WinMain(HINSTANCE hInstance, HINSTANCE hPrevInstance, LPSTR lpCmdLine, int nCmdShow) {
// TODO: create window.

// Construct LynxView.
lynx::pub::LynxView::Builder builder;
builder.SetScreenSize(800, 600, 1.0)
.SetFrame(0, 0, 800, 600)
.SetParent(hwnd);
// Set Resource fetcher if needed.
// builder.SetGenericResourceFetcher(std::make_shared<ExampleGenericResourceFetcher>());
auto lynx_view = builder.Build();

auto load_meta = std::make_shared<lynx::pub::LynxLoadMeta>();
// Set to your location.
load_meta->SetUrl("file://C:\\Users\\Admin\\Documents\\main.lynx.bundle");
lynx_view->LoadTemplate(load_meta);

// Run message.
MSG msg = {0};
while (GetMessage(&msg, NULL, 0, 0)) {
TranslateMessage(&msg);
DispatchMessage(&msg);
}
return 0;
}
然后你将在屏幕上看到如下内容:
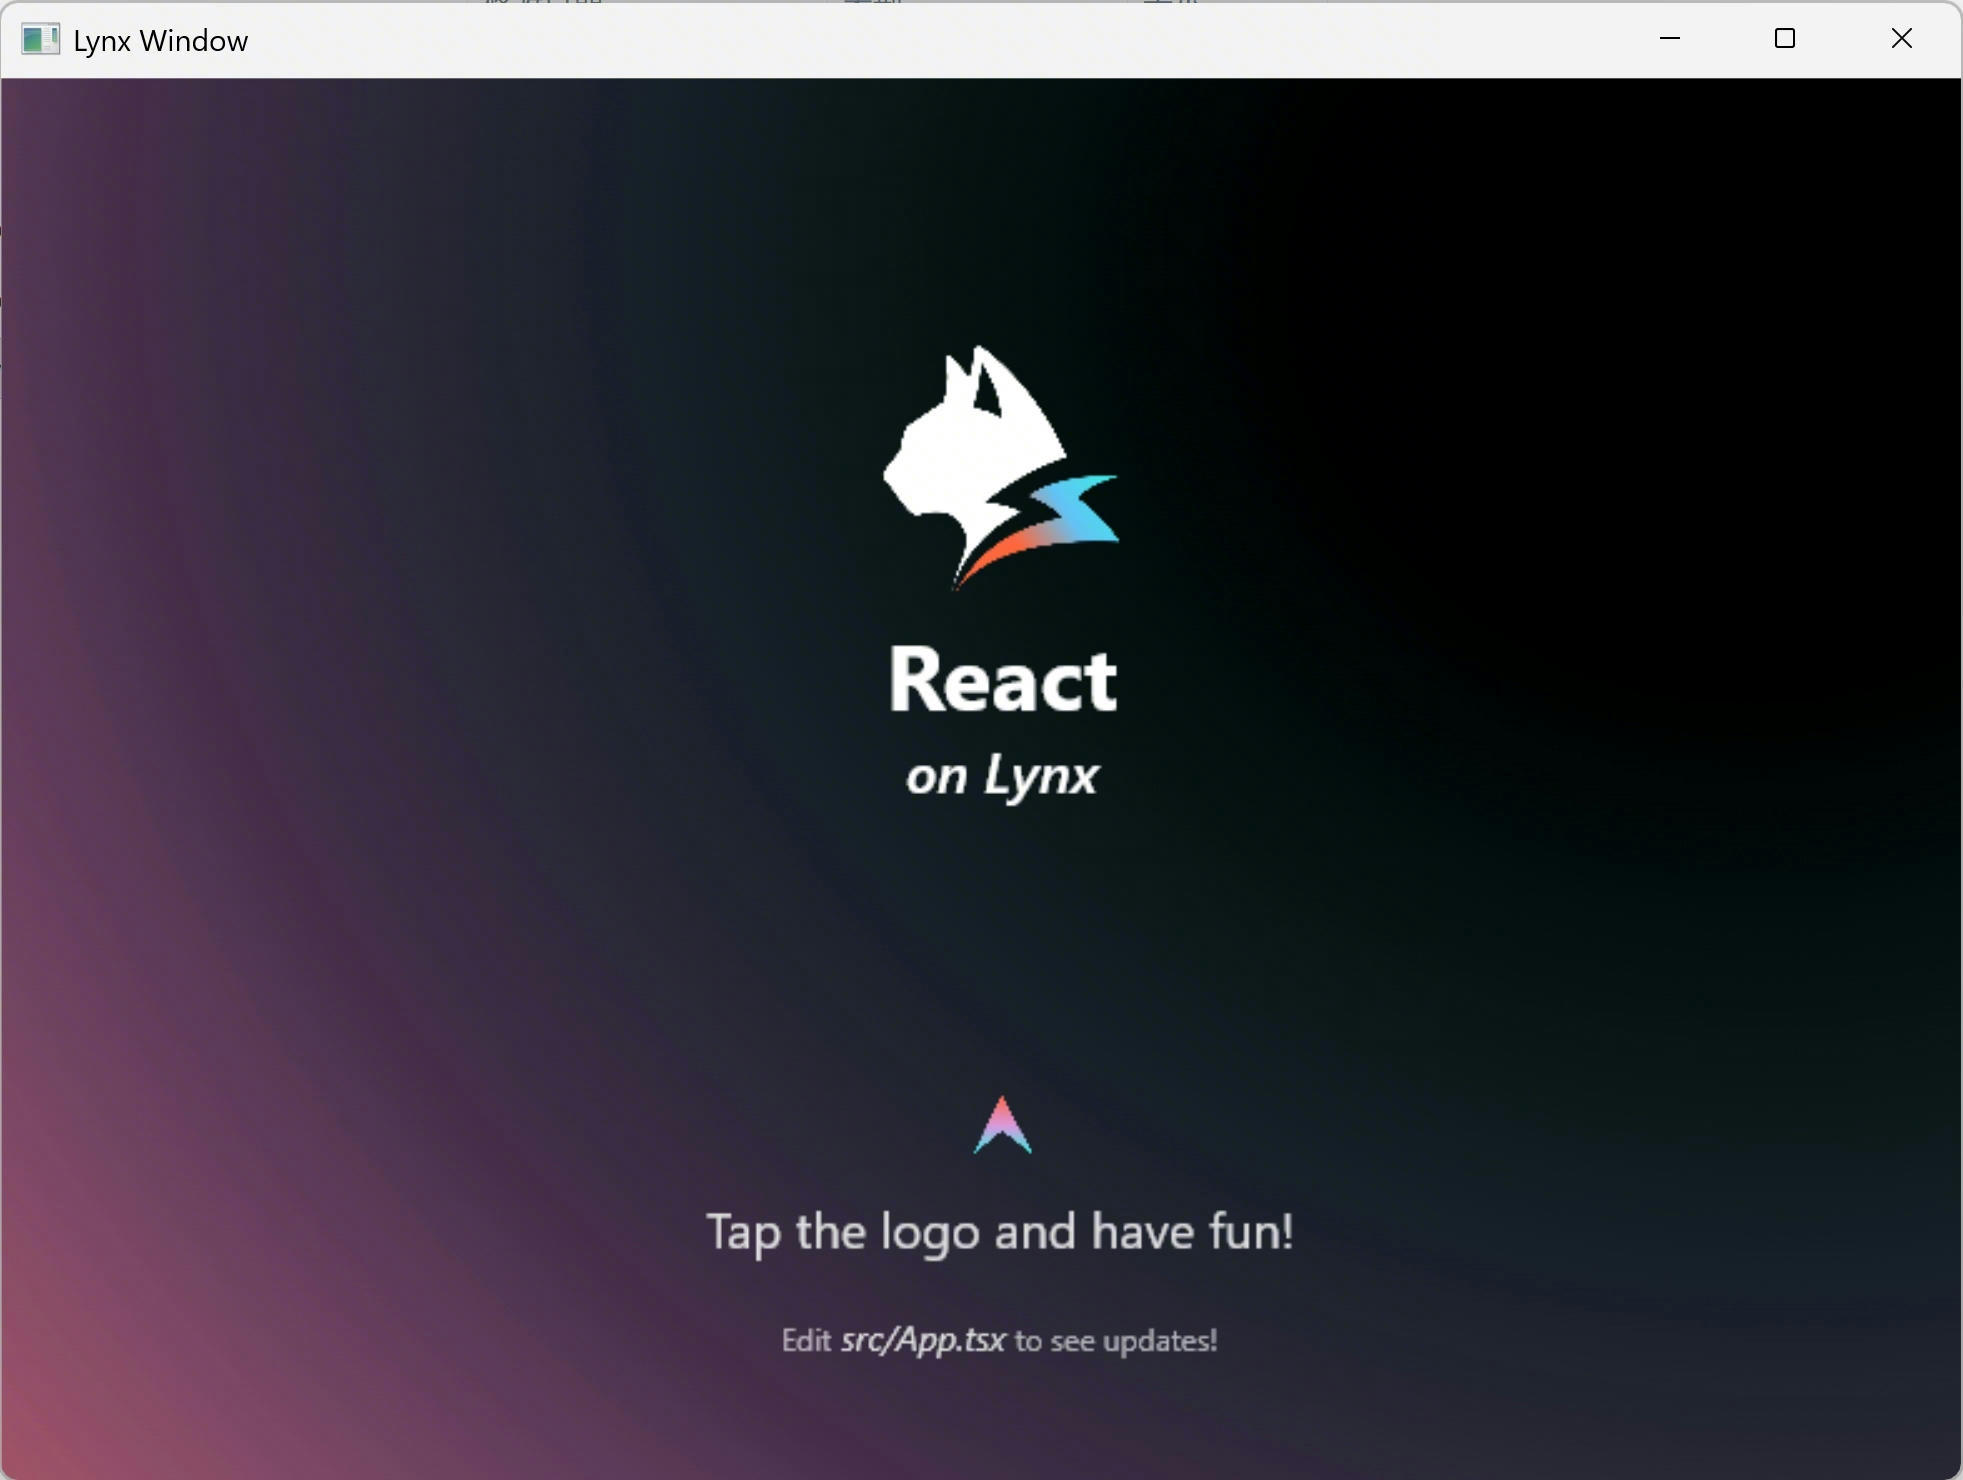
恭喜你,现在你现在已经完成了 Lynx Engine 集成的全部工作!
#4. 进入 Lynx 世界
现在你已经将 Lynx 集成到你的应用中了。请参考开发和调试文档进一步在 Lynx 的世界里遨游吧!
#将 Lynx 集成到 macOS 平台
- 本文假设你已熟悉原生 macOS 应用开发的基本概念。
- 你也可以参考官方的 LynxExplorer 项目。
#1. 依赖配置
#下载或构建 LynxSDK
- 可以从 GitHub Release 4.0.0 下载预编译的LynxSDK。
- 解压下载的LynxSDK到你项目的目录下,比如
thirdparty目录。
或者,你可以按照 为macOS构建 Lynx Explorer 指南从源代码构建。
#配置CMake
本文假设你已有一个基于CMake的macOS原生项目,并且希望集成Lynx能力。如果你使用的其它构建系统,你可以参考本文内容,并自行集成。
- 基于你的项目,设置CMake基本配置。
# Set the C++ standard to at least 17 if you are using the C++ wrapper apis of LynxSDK.
set(CMAKE_CXX_STANDARD 17)
set(CMAKE_CXX_STANDARD_REQUIRED ON)
set(CMAKE_OBJCXX_STANDARD 17)
set(CMAKE_OBJCXX_STANDARD_REQUIRED ON)- 配置LynxSDK相关内容。
set(LYNX_LIB_PATH ${CMAKE_CURRENT_SOURCE_DIR}/thirdparty/lynx) # Or your location of LynxSDK
# Set include directory of LynxSDK.
include_directories(${LYNX_LIB_PATH}/include)
# Set library of LynxSDK that needs to be linked.
target_link_libraries(${PROJECT_NAME} PRIVATE ${LYNX_LIB_PATH}/lib/libLynx.dylib)- 添加自定义命令,用于在构建应用之后,拷贝必须的数据和资源到应用包。
add_custom_command(TARGET ${PROJECT_NAME} POST_BUILD
    # 创建Frameworks目录
    COMMAND mkdir -p "$<TARGET_BUNDLE_CONTENT_DIR:${PROJECT_NAME}>/Frameworks"

    # 复制lynx动态库到Frameworks目录
    COMMAND cp "${LYNX_LIB_PATH}/lib/libLynx.dylib" "$<TARGET_BUNDLE_CONTENT_DIR:${PROJECT_NAME}>/Frameworks/"

    # 创建Resources目录
    COMMAND mkdir -p "$<TARGET_BUNDLE_CONTENT_DIR:${PROJECT_NAME}>/Resources"

    # 复制bundles目录到Resources
    COMMAND cp -R "${LYNX_LIB_PATH}/bundles/" "$<TARGET_BUNDLE_CONTENT_DIR:${PROJECT_NAME}>/Resources/"

    # 复制data目录到Resources
    COMMAND cp -R "${LYNX_LIB_PATH}/data/" "$<TARGET_BUNDLE_CONTENT_DIR:${PROJECT_NAME}>/Resources/"

    COMMENT "Copying Lynx library and resources to application bundle"
)

# 设置rpath,确保应用程序能够找到内部Frameworks目录中的动态库
target_link_options(${PROJECT_NAME} PRIVATE
    "-Wl,-rpath,@executable_path/../Frameworks"
)#2. 环境初始化 - 可选
#Lynx Service 初始化
- Lynx Service 提供了宿主特性相关能力,推荐在LynxView创建之前完成 Lynx Service 的初始化。
- Lynx Service 需主动注入。
#import "AppDelegate.h"
#import "ViewController.h"

#import "lynx_env.h"
#import "lynx_http_service.h"
#import "lynx_view.h"

// Implements the http service if needed.
class LynxHttpServiceImpl : public lynx::pub::LynxHttpService {
public:
LynxHttpServiceImpl() = default;
~LynxHttpServiceImpl() = default;
void Request(std::shared_ptr<lynx::pub::LynxHttpRequest> request, std::shared_ptr<lynx::pub::LynxHttpResponse> response) override {
// TODO
}
};

@interface AppDelegate ()
@end

@implementation AppDelegate {
}

- (void)applicationDidFinishLaunching:(NSNotification \*)aNotification {
  // Register http service for lynx.fetch.
  lynx::pub::LynxServiceCenter::GetInstance().RegisterService(std::make_shared<LynxHttpServiceImpl>());
  }
#LynxEnv 初始化
LynxEnv 提供了 Lynx Engine 的全局初始化接口, 请保证 LynxEnv 的初始化发生在 Lynx Engine 的任何接口调用之前。
#import "AppDelegate.h"
#import "ViewController.h"

#import "lynx_env.h"
#import "lynx_http_service.h"
#import "lynx_view.h"

@interface AppDelegate ()
@end

@implementation AppDelegate {
}

- (void)applicationDidFinishLaunching:(NSNotification *)aNotification {
    // Register http service for lynx.fetch.
  lynx::pub::LynxServiceCenter::GetInstance().RegisterService(std::make_shared<LynxHttpServiceImpl>());

  // Initialize LynxEnv
  auto& lynx_env = lynx::pub::LynxEnv::GetInstance();
  // Enable devtool.
  lynx_env.SetDevtoolEnabled(true);
  lynx_env.SetDevtoolAppInfo("App", "LynxExplorer");
  lynx_env.SetDevtoolAppInfo("AppVersion", "1.0.0");
  // Register global native module if needed.
  // lynx_env.RegisterNativeModule("ExplorerModule", ExplorerModuleCreator, nullptr);
}
#3. 渲染 LynxView
#创建资源加载器
Lynx Engine 自身并没有集成下载资源的能力,因此需要宿主应用来提供 LynxGenericResourceFetcher 的具体实现,并在构造 LynxView 时注入,Lynx 会采用注入的资源加载器来获取真实的 Bundle 内容。
你可以使用多种方式获取 Bundle 的资源内容,在这里我们选择通过网络加载 Bundle 的内容。
实现 Resource Fetcher
#import <Foundation/Foundation.h>
#import "lynx_generic_resource_fetcher.h"

class ExampleGenericResourceFetcher : public lynx::pub::LynxGenericResourceFetcher {
public:
void FetchResource(std::shared_ptr<lynx::pub::LynxResourceRequest> request, std::shared_ptr<lynx::pub::LynxResourceResponse> response) override;
};
#import <Foundation/Foundation.h>
#import "ExampleGenericResourceFetcher.h"

void ExampleGenericResourceFetcher::FetchResource(std::shared_ptr<lynx::pub::LynxResourceRequest> request, std::shared_ptr<lynx::pub::LynxResourceResponse> response) {
  const char *url_str = request->GetUrl();
  NSString *ns_string = [NSString stringWithUTF8String:url_str];

  NSURL *url = [NSURL URLWithString:ns_string];
  NSMutableURLRequest *nsRequest = [NSMutableURLRequest requestWithURL:url];
  NSURLSession *session = [NSURLSession sharedSession];
  NSURLSessionDataTask *dataTask =
    [session dataTaskWithRequest:nsRequest
              completionHandler:^(NSData *_Nullable data, NSURLResponse *_Nullable nsResponse,
                                  NSError *_Nullable error) {
                if (data && data.length > 0) {
                  response->SetCode(0);
                  response->SetData(
                      (uint8_t *)data.bytes, data.length,
                      [](uint8_t *body, size_t length, void *opaque) { CFRelease(opaque); },
                      (__bridge_retained void *)data);
                } else {
                  response->SetCode(-1);
                  response->SetErrorMessage("error");
                }
                response->Complete();
              }];

  [dataTask resume];
}
#构造 LynxView
LynxView 是 Lynx Engine 提供的渲染基本单元,你可以快速的构造一个 LynxView,并通过设置一个NSView作为父容器将其任意添加到原生macOS的视图树上。
#import "ViewController.h"
#import "ExampleGenericResourceFetcher.h"

#import "lynx_env.h"
#import "lynx_http_service.h"
#import "lynx_view.h"

@interface ViewController ()
@property(nonatomic) std::shared_ptr<lynx::pub::LynxView> lynxView;
@end

@implementation ViewController {
}

- (void)viewDidLoad {
  [super viewDidLoad];

  lynx::pub::LynxView::Builder builder;
  builder.SetScreenSize(self.view.frame.size.width, self.view.frame.size.height, 1.0)
  .SetFrame(0, 0, self.view.frame.size.width, self.view.frame.size.height)
  .SetParent((\_\_bridge NativeWindow)self.view)
  .SetGenericResourceFetcher(std::make_shared<ExampleGenericResourceFetcher>());
  self.lynxView = builder.Build();
  }

- (void)viewDidLayout {
  [super viewDidLayout];
  // It's necessary when resizing the Window.
  self.lynxView->UpdateScreenMetrics(self.view.frame.size.width, self.view.frame.size.height,
  1.0);
  self.lynxView->SetFrame(0, 0, self.view.frame.size.width, self.view.frame.size.height);
  }
#渲染视图
当你完成以上步骤之后,已经完成了 LynxView 创建与资源读取的全部工作,调用 lynxView->LoadTemplate 方法,即可将对应的 Bundle 内容渲染到 LynxView 视图上。
#import "ViewController.h"
#import "ExampleGenericResourceFetcher.h"

#import "lynx_env.h"
#import "lynx_http_service.h"
#import "lynx_view.h"

@interface ViewController ()
@property(nonatomic) std::shared_ptr<lynx::pub::LynxView> lynxView;
@end

@implementation ViewController {
}

- (void)viewDidLoad {
  [super viewDidLoad];

  lynx::pub::LynxView::Builder builder;
  builder.SetScreenSize(self.view.frame.size.width, self.view.frame.size.height, 1.0)
    .SetFrame(0, 0, self.view.frame.size.width, self.view.frame.size.height)
    .SetParent((__bridge NativeWindow)self.view)
    .SetGenericResourceFetcher(std::make_shared<ExampleGenericResourceFetcher>());
  self.lynxView = builder.Build();
  [self loadTemplate];
  }

- (void)loadTemplate {
  // Call `loadTemplate` where you want.
  auto meta_data = std::make_shared<lynx::pub::LynxLoadMeta>();
  meta_data->SetUrl("https://unpkg.com/@lynx-example/hello-world/dist/main.lynx.bundle");
  // Load template with meta_data
  self.lynxView->LoadTemplate(meta_data);
  }
然后你将在屏幕上看到如下内容:
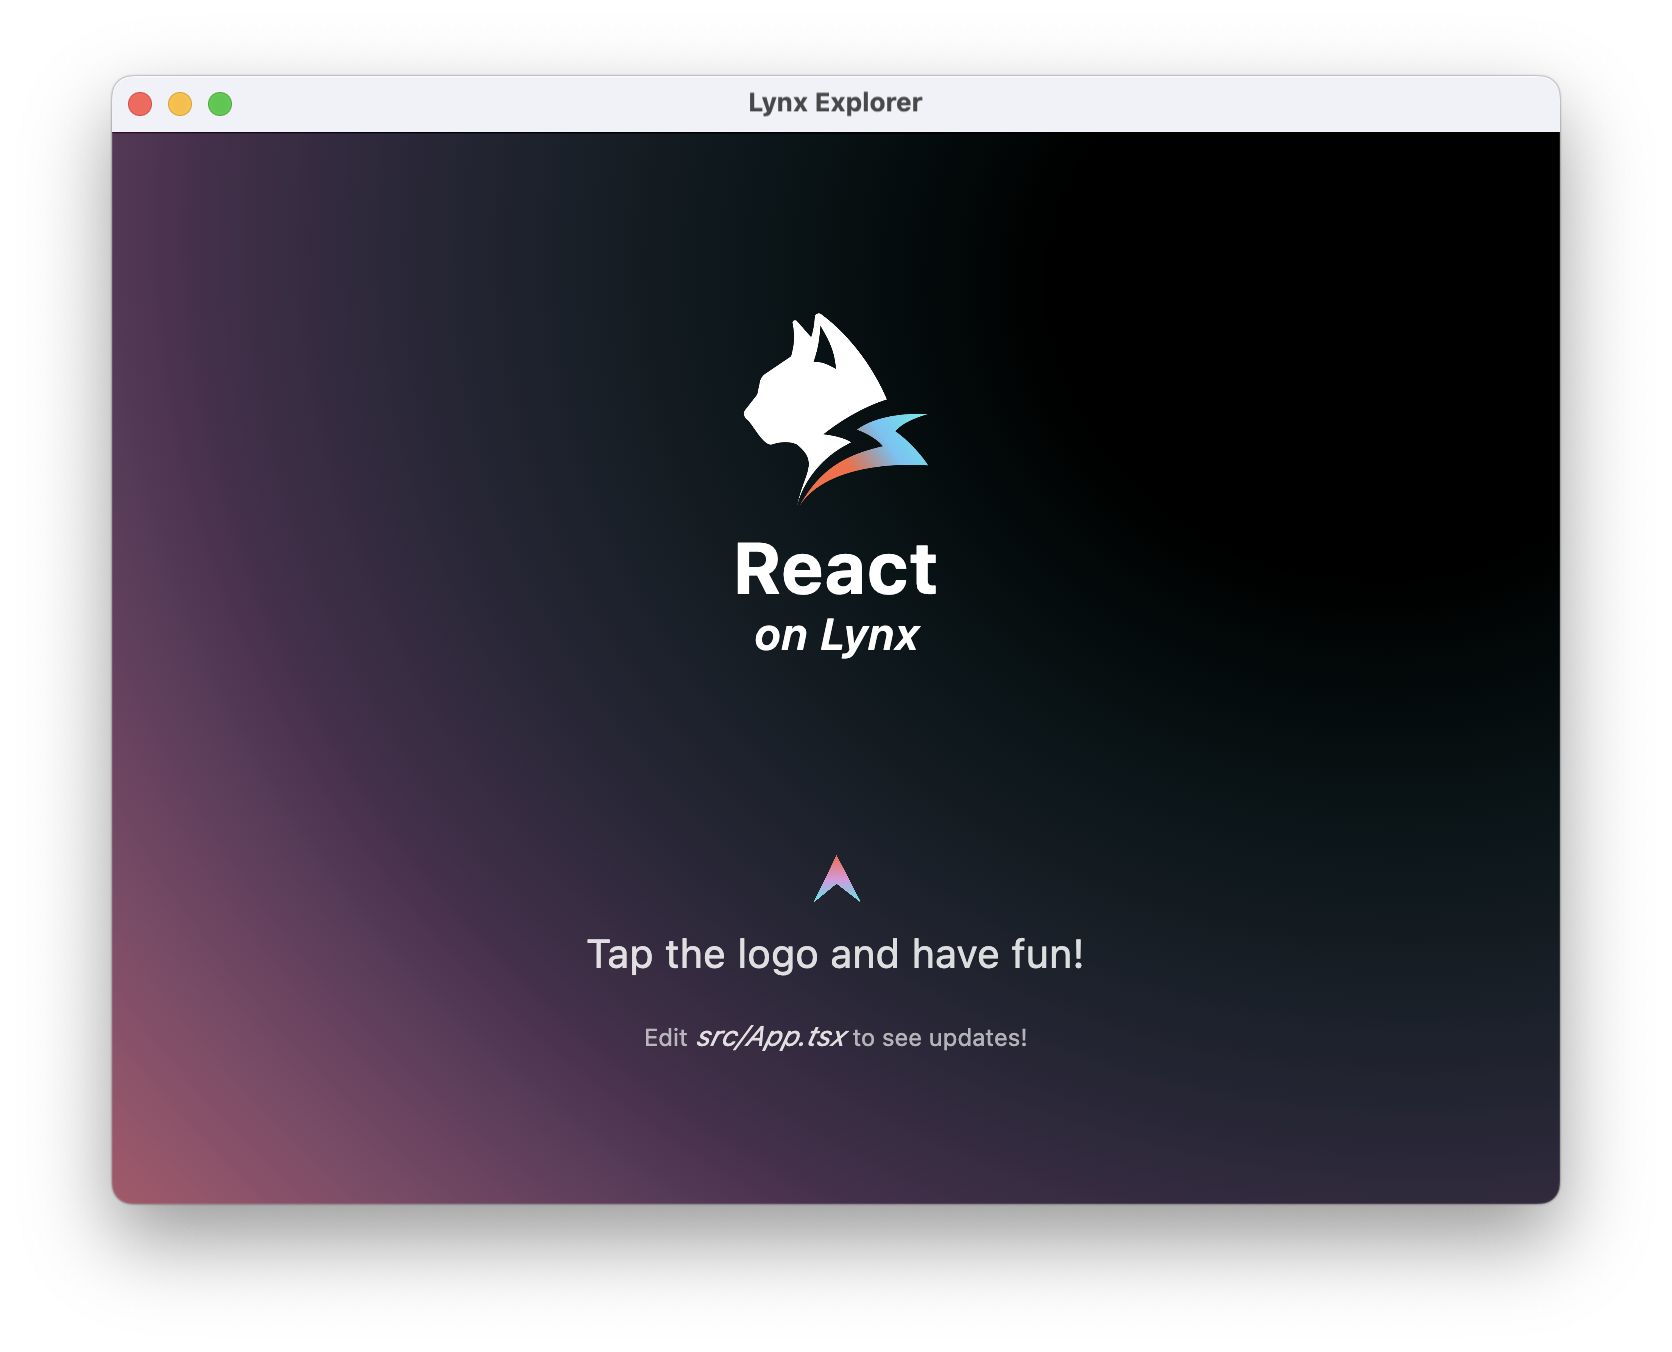
恭喜你,现在你现在已经完成了 Lynx Engine 集成的全部工作!
#4. 进入 Lynx 世界
现在你已经将 Lynx 集成到你的应用中了。请参考开发和调试文档进一步在 Lynx 的世界里遨游吧!
在开发过程中,你可以使用 Lynx Explorer 快速预览和迭代 Lynx 页面,然后再集成到原生应用中。切换到用 Explorer 体验进行设置。